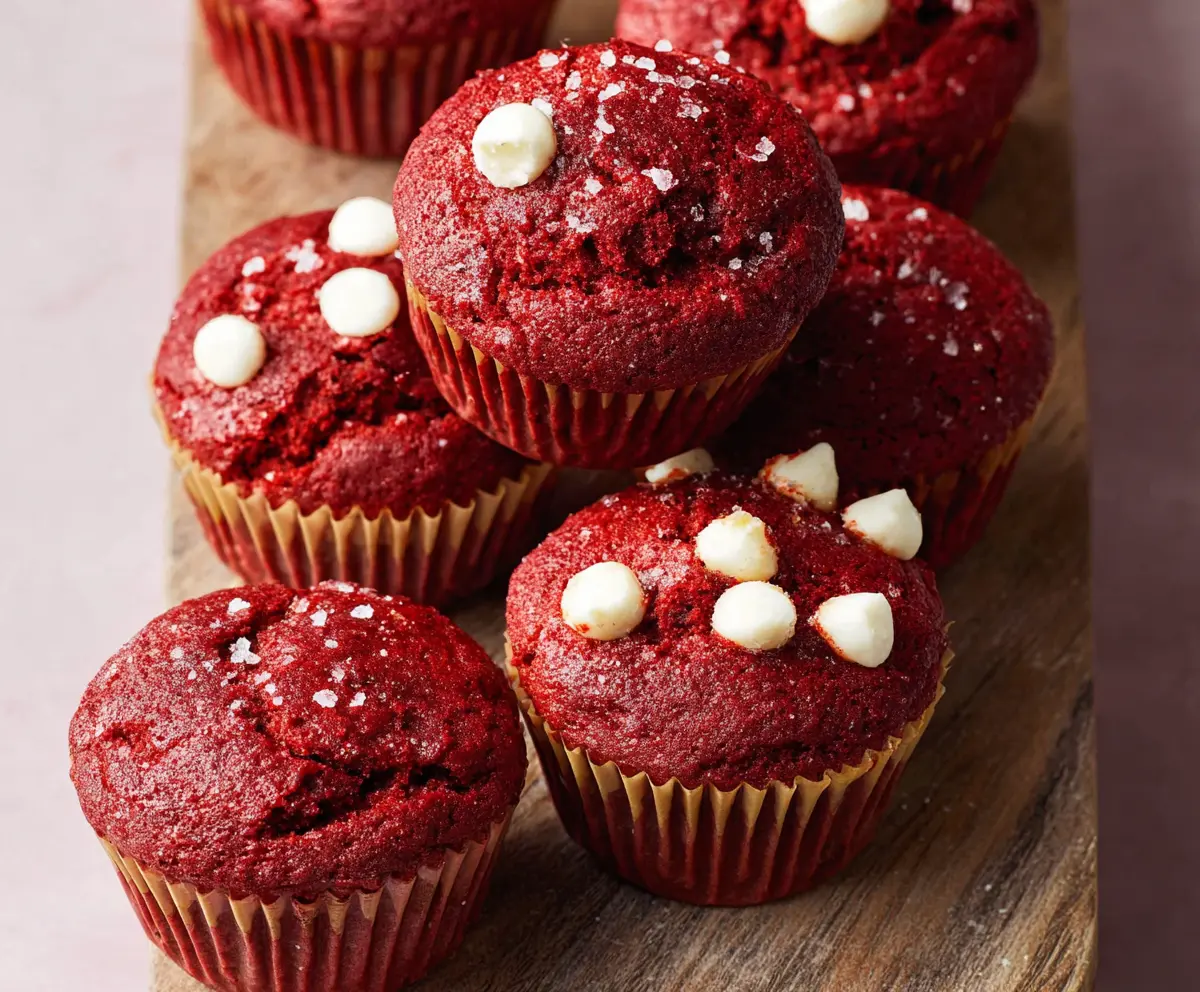
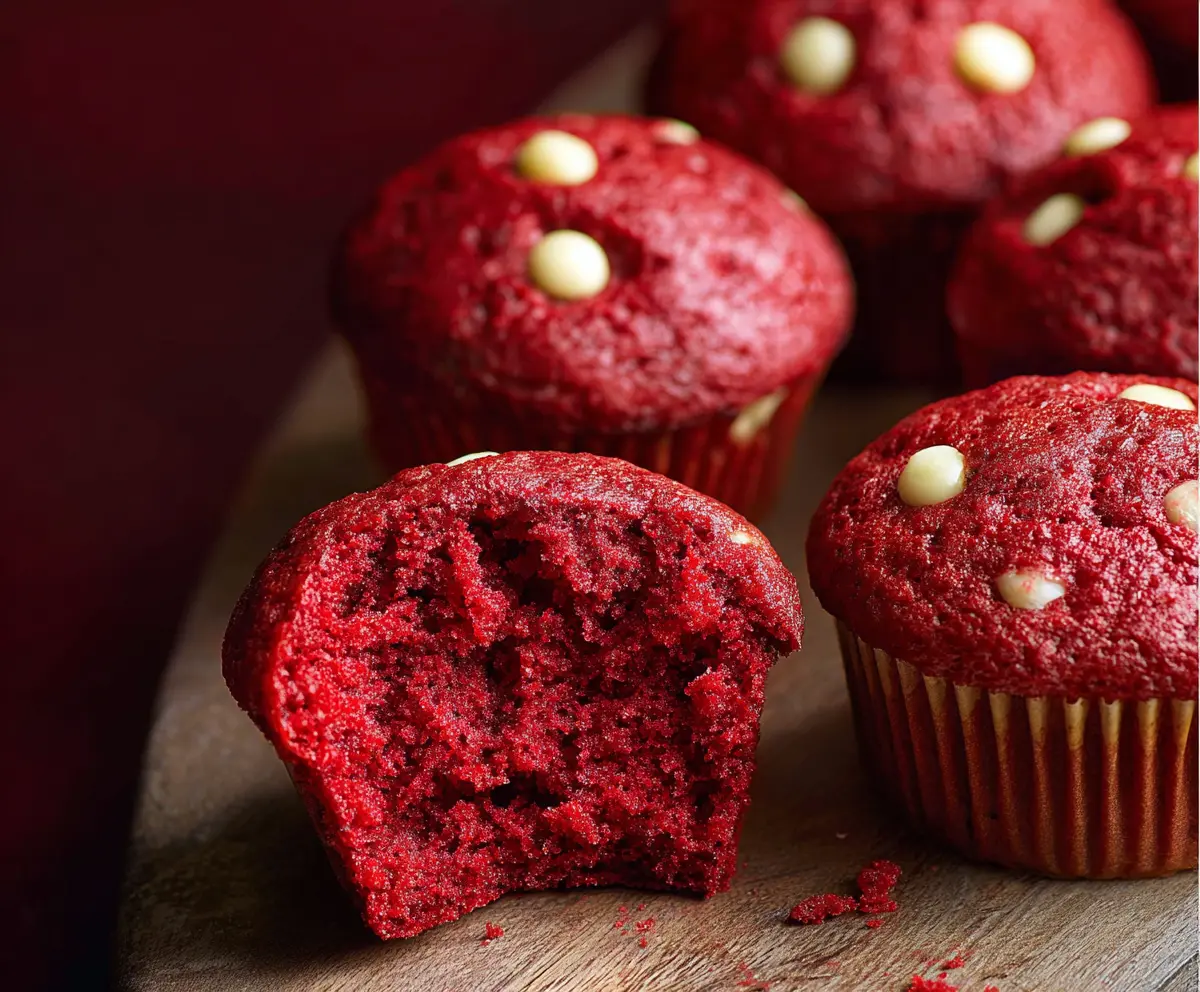
These red velvet muffins are soft, fluffy, and oh-so-delicious! With a lovely red color and a hint of cocoa, they’re perfect for any sweet treat moment.
Trust me, the cream cheese frosting on top makes them extra special. Who can resist a little extra sweetness? I can’t! I love serving these for breakfast or as an afternoon snack.
Key Ingredients & Substitutions
All-Purpose Flour: This is the base of your muffins. If you want to make them gluten-free, use a 1:1 gluten-free flour blend. Just remember, each flour behaves differently, so check for consistency.
Granulated Sugar: Regular granulated sugar is a must for sweetness. If you’re watching your sugar intake, consider using coconut sugar or a sugar substitute like stevia, though it may impact texture slightly.
Buttermilk: This ingredient adds moisture and tanginess. If you don’t have buttermilk, mix regular milk with a tablespoon of vinegar or lemon juice and let it sit for 5 minutes to thicken up.
Vegetable Oil: I love using vegetable oil for its neutral flavor. You can swap it with melted coconut oil or unsweetened applesauce for a lighter take.
Red Food Coloring: This gives muffins their signature color! If you prefer a natural option, beet juice can work, though it may give a slightly different hue.
White Chocolate Chips: I like adding these for a touch of creaminess. You can replace them with dark chocolate chips or leave them out for a less sweet option.
What’s the Key to Getting Fluffy Muffins?
When it comes to achieving that soft and fluffy texture, proper mixing is crucial. Start by sifting your dry ingredients to avoid lumps. Mix the wet and dry ingredients just until combined—overmixing can lead to dense muffins. Here’s how:
- Combine wet ingredients in one bowl, and whisk until you see a smooth consistency.
- Pour the dry mixture into the wet. Stir gently until you no longer see dry flour.
- Remember, a light hand prevents too much gluten development, which keeps your muffins light.
Red Velvet Muffins (Soft and Fluffy)
Ingredients You’ll Need:
For The Muffins:
- 2 1/2 cups all-purpose flour
- 1 1/2 cups granulated sugar
- 1 teaspoon baking soda
- 1 teaspoon fine salt
- 1 teaspoon cocoa powder (unsweetened)
- 1 1/2 cups vegetable oil
- 1 cup buttermilk, at room temperature
- 2 large eggs, at room temperature
- 2 tablespoons red food coloring
- 1 teaspoon vanilla extract
- 1 teaspoon white vinegar
- 1 cup white chocolate chips or cream cheese chips (optional)
- Coarse sugar or sanding sugar, for sprinkling (optional)
How Much Time Will You Need?
This delicious recipe takes about 15 minutes of prep time and about 20 minutes of baking time. Plus, you’ll want to give them a few minutes to cool after baking! In total, you’re looking at around 35-40 minutes for a delightful batch of red velvet muffins.
Step-by-Step Instructions:
1. Preheat the Oven:
Start by preheating your oven to 350°F (175°C). This way, it’s nice and hot when you’re ready to bake. Line a standard 12-cup muffin tin with paper liners to prevent sticking and make cleanup easier.
2. Prepare the Dry Ingredients:
In a large bowl, sift together the all-purpose flour, sugar, baking soda, fine salt, and cocoa powder. This ensures everything is evenly mixed and will help prevent lumps. Give it a good whisk to combine nicely.
3. Mix the Wet Ingredients:
In another large bowl, whisk together the vegetable oil, buttermilk, eggs, red food coloring, vanilla extract, and white vinegar. Mix until it’s smooth and well combined. This mixture will give your muffins their moisture and flavor.
4. Combine Dry and Wet Ingredients:
Now, it’s time to bring the two mixtures together! Gradually add the dry ingredients into the wet ingredients, using a spatula to mix gently. Stop mixing as soon as there are no dry streaks—lumps are okay!
5. Add the Chocolate Chips:
If you’re using white chocolate or cream cheese chips, gently fold them into the batter now. This adds a lovely treat in every bite!
6. Fill the Muffin Cups:
Divide the muffin batter evenly among the prepared muffin cups, filling each about 3/4 full. If you want to get fancy, sprinkle some coarse sugar on top for a little sparkle!
7. Bake the Muffins:
Place the muffin tin in your preheated oven and bake for 18-22 minutes. They’re done when a toothpick inserted into the center comes out clean, and the tops spring back when you press them gently.
8. Cool the Muffins:
Once baked, remove the muffins from the oven and let them cool in the pan for about 5 minutes. Then transfer them to a wire rack to cool completely. This helps keep them fluffy!
9. Serve and Enjoy:
Finally, serve your delicious red velvet muffins as they are, or top them with a dollop of cream cheese frosting if you’re feeling extra indulgent. Enjoy your soft, moist, and fluffy creation!
Can I Use a Different Type of Flour?
Yes, you can! If you need a gluten-free option, use a 1:1 gluten-free flour blend. Just be aware that different flours can yield varying textures, so your muffins may be slightly different in consistency.
How Can I Make These Muffins Healthier?
You can reduce the sugar by about 1/4 cup without significantly affecting the texture. For a healthier fat option, substitute some of the vegetable oil with unsweetened applesauce. This will keep them moist while cutting down on calories!
What’s the Best Way to Store Leftover Muffins?
Store leftover muffins in an airtight container at room temperature for up to 3 days. If you want them to last longer, you can freeze them for up to 3 months. Just wrap them tightly in plastic wrap and place them in a freezer-safe bag. Thaw them overnight in the fridge or at room temperature when you’re ready to enjoy!
Can I Make These Muffins Ahead of Time?
Absolutely! You can prepare the batter the night before and store it in the fridge. Just give it a little stir before filling your muffin cups to ensure it’s well mixed again. Alternatively, you can bake them ahead and simply reheat in the microwave for a few seconds to warm them up before serving.