This Pistachio Pudding Tart is a creamy and nutty delight! With a crunchy crust and smooth pistachio filling, it makes for a perfect dessert that wows at any gathering.
If you’re like me, you’ll find it hard to resist sneaking a spoonful before serving. Let’s be real, it’s just too tasty! I love serving this tart chilled—it’s like a little piece of heaven on a plate!
Key Ingredients & Substitutions
All-Purpose Flour: This is the base for your crust, giving it the right texture. If you need a gluten-free option, consider using a 1:1 gluten-free flour blend.
Unsalted Butter: Cold butter is crucial for a flaky crust. If you prefer, coconut oil can be a great dairy-free alternative, although it will slightly change the flavor.
Instant Pistachio Pudding Mix: This is key for that creamy filling. You can use vanilla pudding mix instead if pistachio isn’t available, but your tart will have a different flavor.
Heavy Cream: This adds richness to both the filling and topping. If you’re looking for a lower-fat option, try using half-and-half, but it may lack the same creaminess.
How Do I Ensure My Tart Crust is Perfectly Flaky?
Making a flaky tart crust can be tricky, but with the right technique, you can nail it! Here are some tips:
- Keep your butter very cold. It helps create steam as it bakes, making the crust flaky.
- Don’t over-mix the dough. You want some butter chunks visible—this promotes flakiness!
- Chill the dough. It relaxes the gluten, preventing shrinkage during baking.
- Pricking the bottom of the crust helps prevent it from puffing up while baking.
What’s the Best Way to Whip Cream?
Whipping cream can seem daunting, but it’s pretty straightforward! Follow these steps for success:
- Start with cold heavy cream. Chill your mixing bowl and whisk for even better results.
- Add powdered sugar and vanilla to sweeten the cream as you whip.
- Whip on medium-high speed until stiff peaks form. Don’t over-whip, or it can turn grainy!
With these tips, your Pistachio Pudding Tart will turn out delicious every time, and your friends will surely be impressed!
Pistachio Pudding Tart
Ingredients You’ll Need:
For the Crust:
- 1 1/4 cups (150g) all-purpose flour
- 1/4 cup (50g) granulated sugar
- 1/4 teaspoon salt
- 1/2 cup (115g) unsalted butter, cold and cubed
- 1 large egg yolk
- 2-3 tablespoons ice water
For the Pistachio Pudding Filling:
- 2 cups (480ml) whole milk
- 1 package (3.4 oz / 96g) instant pistachio pudding mix
- 1/2 cup (120ml) heavy cream
- 1 tablespoon powdered sugar (optional, adjust to taste)
For the Topping:
- 1 cup (240ml) heavy cream
- 2 tablespoons powdered sugar
- 1/2 teaspoon vanilla extract
- 1/4 cup chopped shelled pistachios
How Much Time Will You Need?
This Pistachio Pudding Tart will take around 30 minutes to prepare, plus an additional hour for chilling. If you count the time needed to bake and cool the crust, plan for about 1.5 hours in total. Don’t forget to make space in your fridge to let it set!
Step-by-Step Instructions:
1. Make the Tart Crust:
Start by combining the flour, granulated sugar, and salt in a food processor. Pulse it together until well-mixed. Now, add the cold, cubed butter and pulse again until the mixture looks like coarse crumbs. Next, mix in the egg yolk and continue to pulse until combined. Gradually add ice water, just a tablespoon at a time, until the dough starts to form. Once it does, shape it into a ball, flatten it into a disk, and wrap it in plastic wrap. Pop it into the fridge for at least 30 minutes to chill!
2. Bake the Tart Shells:
While your dough is chilling, preheat your oven to 350°F (175°C). After the dough is ready, roll it out on a floured surface to about 1/8 inch thick. Cut it into circles and press them into tart pans or small molds. Don’t forget to prick the bottoms with a fork to prevent puffing while baking! Bake for 15-18 minutes, or until they turn golden brown. Once done, take them out and let them cool completely.
3. Prepare the Pistachio Pudding Filling:
In a bowl, whisk together the whole milk and instant pistachio pudding mix as per the package instructions. Give it about 5 minutes to thicken up. In another bowl, whip the heavy cream with powdered sugar until you see stiff peaks forming. Gently fold your whipped cream into the pistachio pudding mixture until it’s smooth and creamy.
4. Fill the Tart Shells:
Once your tart shells are cool, it’s time to fill them! Spoon or pipe the pistachio pudding filling into each shell. Try to fill them evenly and generously. Now, cover them with plastic wrap and chill in the fridge for at least an hour to let that filling set.
5. Make the Whipped Cream Topping:
For the topping, whip the heavy cream with powdered sugar and vanilla extract until you get stiff peaks again. Now it’s time to be creative! You can either pipe or dollop the lovely whipped cream onto each tart just before serving.
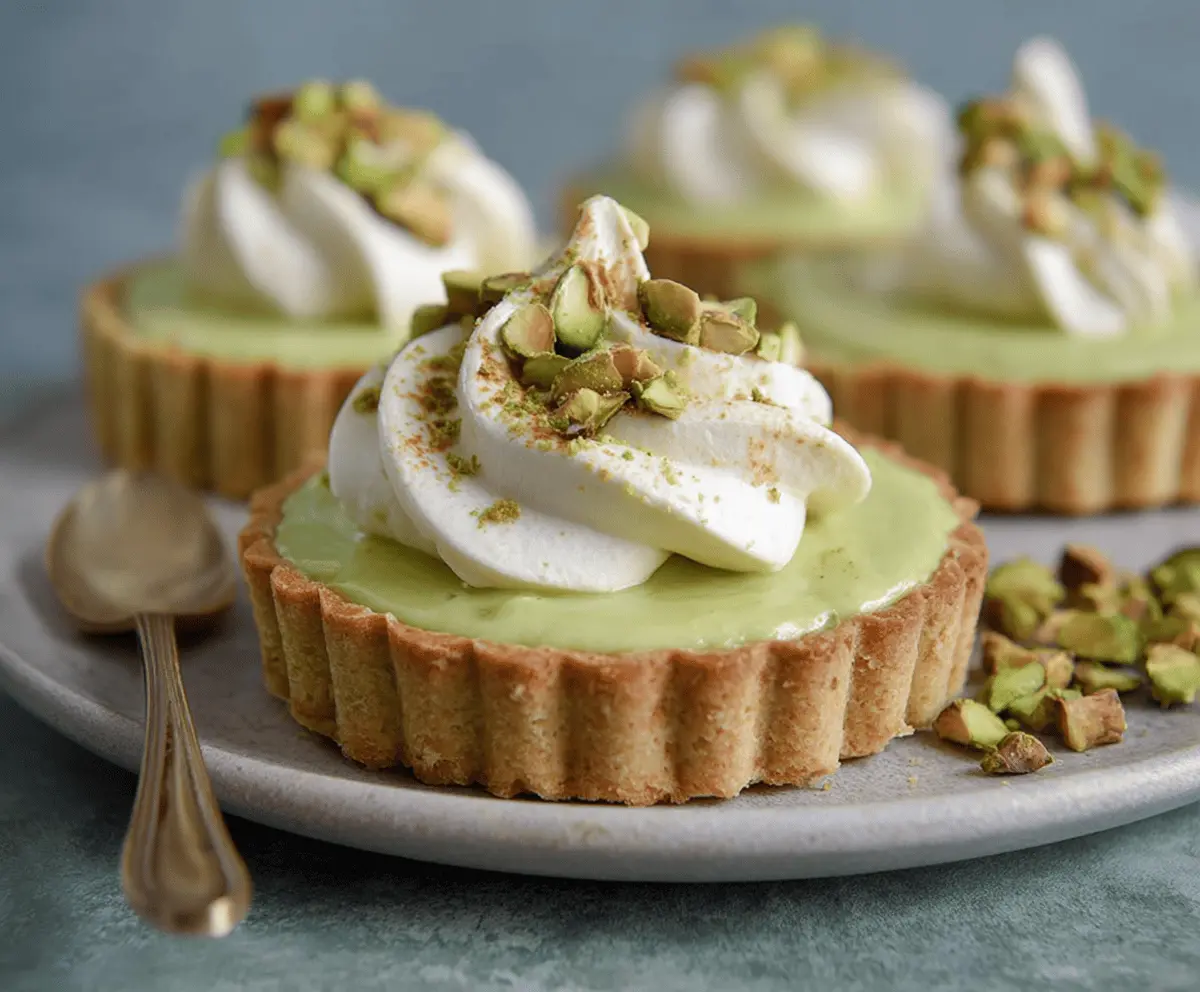
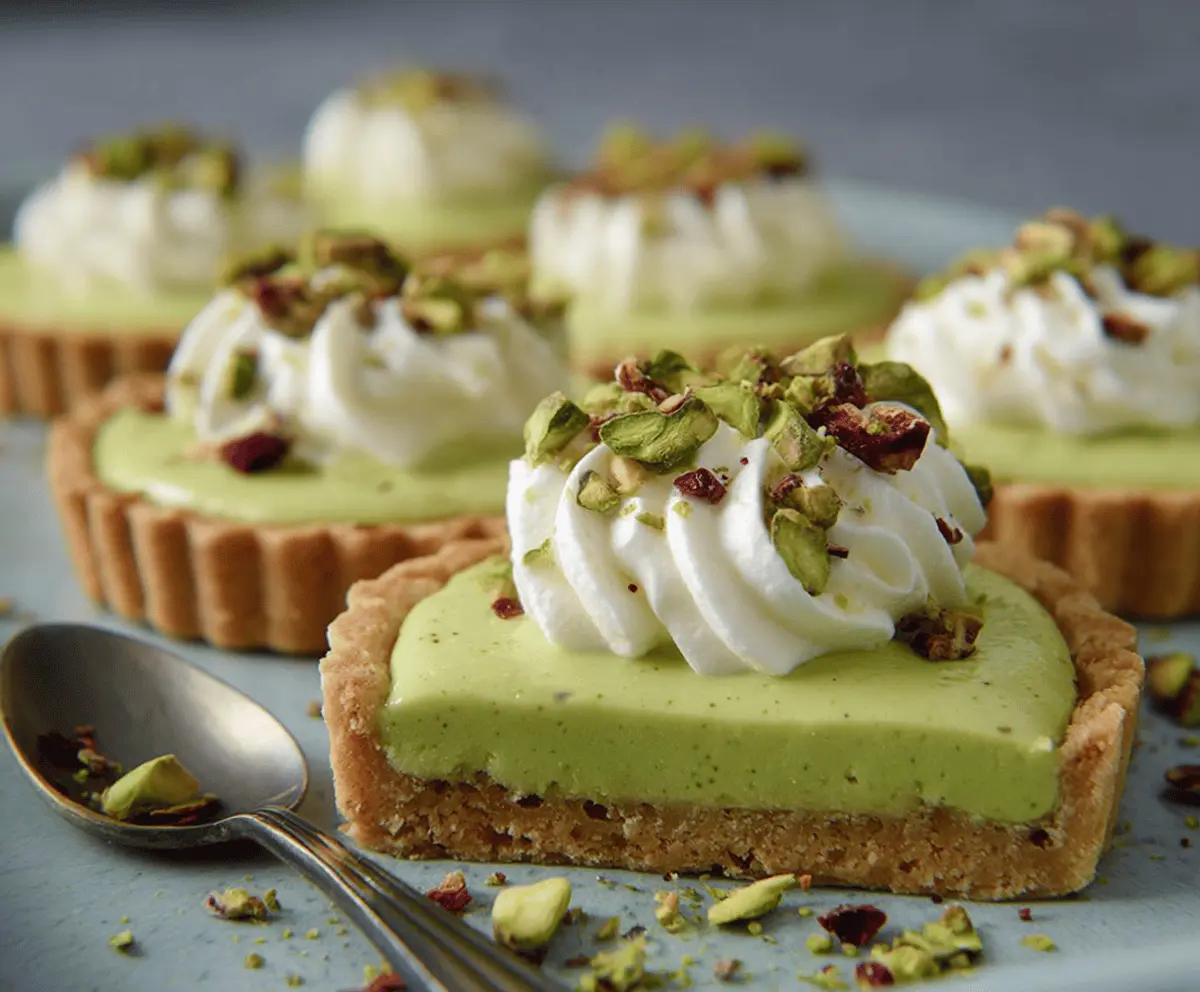
6. Garnish and Serve:
To make your tart truly shine, sprinkle the tops with chopped pistachios. If you’re feeling a bit extra, dust a pinch of ground cinnamon or some extra crushed pistachios on top for that pop of color and flavor. Now your Pistachio Pudding Tart is ready to be enjoyed! Serve chilled, and watch it disappear!
This tart has it all: a crispy buttery crust, a rich pistachio filling, and a fluff of whipped cream on top, just like in the picture! Enjoy making and sharing this delightful dessert!
Can I Use a Pre-Made Tart Shell?
Absolutely! If you’re short on time, a pre-made tart shell will work perfectly. Just follow the instructions for filling and baking as directed, skipping the crust-making steps.
What Can I Substitute for Heavy Cream?
If you want a lighter option, you can use half-and-half instead of heavy cream for the pudding filling. For the topping, consider using a whipped topping to keep it dairy-free!
Can I Make This Tart Ahead of Time?
Yes, this tart can be made a day in advance! Just follow all the steps and keep it chilled in the refrigerator until you’re ready to serve. Just add the whipped cream topping right before serving for the best texture.
How Do I Store Leftovers?
Store any leftovers in an airtight container in the refrigerator for up to 3 days. To keep the crust from getting soggy, you may want to keep the whipped cream separate until you’re ready to eat.