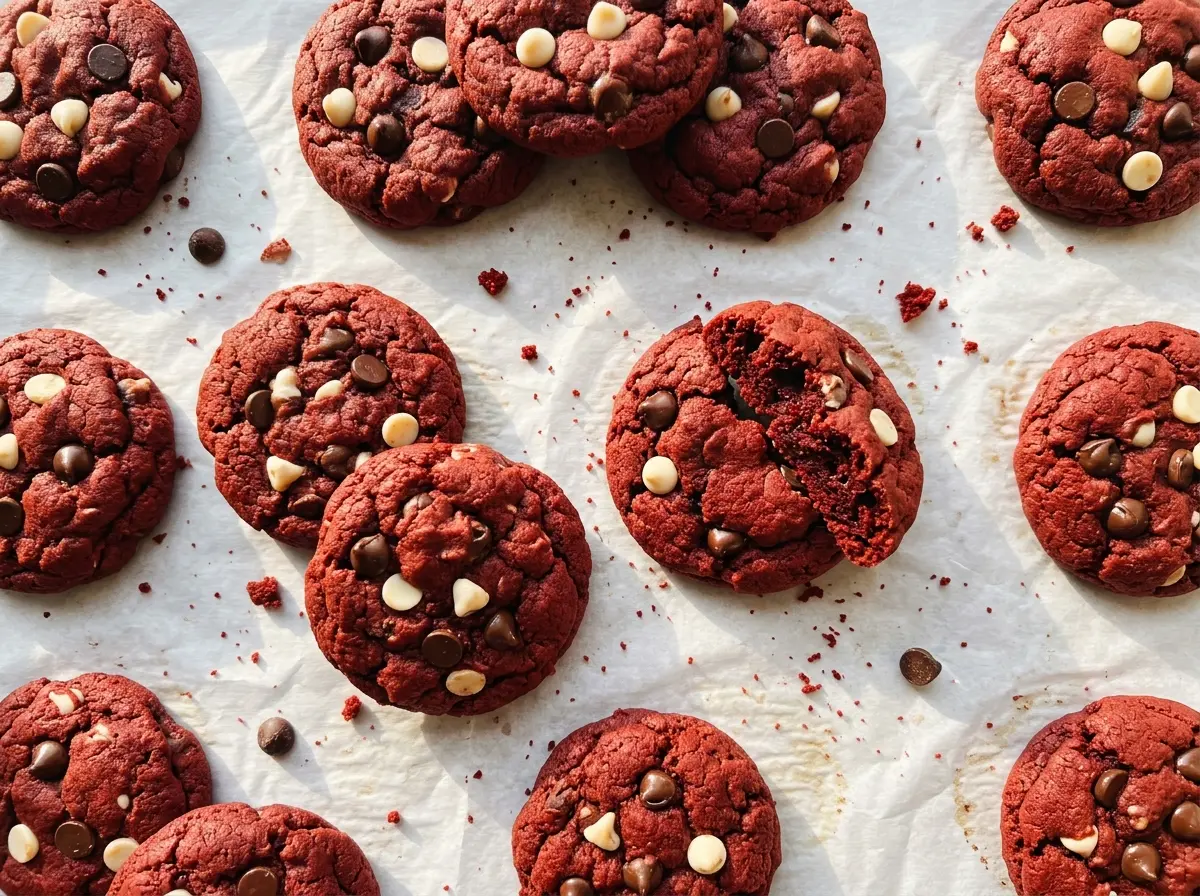
The dough changes from bright red to a deeper shade as the cocoa and flour mix in, and that’s where I used to wonder whether I’d added enough color. These Red Velvet Cookies should read as red velvet, not as chocolate cookies painted red. The cream cheese frosting gives each one a cool, tangy finish against the sweet cookie, which is why I keep the topping smooth and simple.
The balance starts with a restrained amount of cocoa, so its flavor comes through without taking over the red velvet character. A 30-minute chill firms the dough before it’s portioned, making the rounded scoops easier to handle. The finished cookies have soft centers beneath a lightly set edge, with a creamy layer of frosting on top.
Kitchen Note
Let the baking sheet cool completely before you scoop the next batch onto it. A warm sheet starts softening the dough before it reaches the oven, so the cookies can spread differently from one batch to the next.
Save these Red Velvet Cookies for a bake when you want soft red cookies with a creamy cream cheese finish.
Why These Cookies Need Just Enough Cocoa, Not a Chocolate-Cookie Dose
Red velvet has a cocoa note, but it shouldn’t taste like a batch of chocolate cookies with red coloring added. The small amount of unsweetened cocoa here gives the dough that familiar depth while leaving room for the vanilla and the slight tang from the vinegar. Piling in extra cocoa would push the flavor toward chocolate and make the red less vivid.
That balance matters even more once the cream cheese frosting goes on. The cookie underneath should taste gently cocoa-rich, not bitter or heavy, so the creamy topping still has something to contrast with. The dough won’t look as bright after the dry ingredients are mixed in, and that’s normal; the finished color is a deep red rather than a neon shade. Keep the cocoa measure level and use the liquid red food coloring in the dough, and the cookies stay in red velvet territory.
What Keeps the Dough Red and the Frosting Smooth

- All-purpose flour — It gives the cookies their structure. Use all-purpose rather than self-rising flour, since the dough already has a measured leavener.
- Unsweetened cocoa powder — It contributes the mild cocoa flavor without adding extra sugar. Choose a cocoa powder labeled unsweetened; sweetened drinking cocoa isn’t a straight swap.
- Softened unsalted butter — Soft butter creams evenly with the sugar, while unsalted butter keeps the salt level predictable. It should yield when pressed but not look melted or greasy.
- Granulated sugar and egg — Together they help create a cohesive dough and the cookies’ tender texture. Use a large egg as written; a smaller egg can leave the mixture drier.
- Liquid red food coloring — Liquid coloring blends into the wet ingredients and spreads through the dough. The type matters here; concentrated gel coloring isn’t an equal-volume replacement.
- Distilled white vinegar — Its mild acidity belongs in the dough alongside the baking soda. Keep to distilled white vinegar rather than a strongly flavored vinegar.
- Cream cheese — Let it soften before beating so the frosting can turn smooth instead of holding little cold lumps. Use plain cream cheese, not a flavored spread.
- Powdered sugar and milk — Powdered sugar makes the topping smooth, while milk loosens it to a spreadable consistency. Add them after the cream cheese has been beaten smooth.
How to Mix, Chill, and Frost the Cookies Without Losing Their Soft Centers
Cream the Butter, Then Add the Red Ingredients
Whisk the flour, cocoa, baking soda, and salt together in a medium bowl so the cocoa doesn’t stay in little pockets. In a large bowl, beat the softened butter and granulated sugar until light and fluffy, about 2 minutes. Beat in the egg, vanilla, red food coloring, and vinegar until combined. Add the flour mixture on low speed and stop as soon as no dry streaks remain; mixing beyond that point can make the cookies tougher.
Give the Dough Its 30-Minute Chill
Cover the dough and chill it for 30 minutes. It should feel firmer and easier to scoop than it did right after mixing, while still yielding to the scoop. Don’t skip straight from mixing to portioning: the chilled dough is easier to handle in even mounds. While it chills, heat the oven to 350°F and line a large baking sheet with parchment paper.
Bake Until the Edges Set
Scoop rounded 1 1/2-tablespoon portions onto the prepared sheet, leaving about 2 inches between them. Bake for 10–12 minutes, watching for set edges and tops that look dry while the centers remain soft. If you wait for the centers to look firm in the oven, the cookies can bake past that soft middle. Let each batch rest on the baking sheet for 5 minutes, then move the cookies to a rack and let them cool completely before frosting.
Beat and Spread the Cream Cheese Frosting
Beat the softened cream cheese until smooth before adding the powdered sugar and milk. Continue beating until the frosting looks creamy and spreadable, with no visible lumps. Spread it over the completely cooled cookies; warmth from the cookies softens the topping and makes it harder to keep an even layer.
Two Ways to Change the Format Without Changing the Red Velvet Flavor
Turn Them Into Cream Cheese Cookie Sandwiches
Spread the frosting on the flat side of one fully cooled cookie and press a second cookie gently against it. The cream cheese layer becomes the filling instead of a topping, so the result is richer in each bite and a little messier to eat. Pair cookies of similar size so the filling stays inside the edges.
Leave a Batch Unfrosted
Skip the cream cheese topping on some or all of the cookies for a simpler, less-sweet version that puts the cocoa and vanilla forward. The cookies still have their red velvet color and soft centers, but without the tangy, creamy contrast. This is a useful option if you want some cookies ready to pack or freeze separately from the frosted ones.
Storage and Reheating
- Refrigerator: Store frosted cookies in an airtight container for up to 4 days. The frosting firms up in the cold, and the cookie will feel denser until it softens slightly.
- Freezer: Freeze unfrosted cookies in an airtight container with parchment between layers for up to 2 months. Thaw them, then add the frosting; freezing the cookies plain keeps the topping from changing texture.
- Reheating: Don’t reheat cookies with cream cheese frosting. Let out only the cookies you plan to eat and bring them briefly toward room temperature; don’t leave frosted cookies out for more than 2 hours.
Questions That Come Up When Baking Red Velvet Cookies
Red Velvet Cookies
Ingredients
Equipment
Method
- Whisk the flour, cocoa powder, baking soda, and salt together in a medium bowl.
- Beat the butter and granulated sugar in a large bowl until light and fluffy, about 2 minutes.
- Beat in the egg, vanilla, food coloring, and vinegar until combined.
- Add the flour mixture and mix on low just until no dry streaks remain.
- Cover and chill the dough for 30 minutes.
- Heat the oven to 350°F and line a large baking sheet with parchment paper.
- Scoop rounded 1 1/2-tablespoon portions of dough onto the baking sheet, spacing them about 2 inches apart.
- Bake for 10–12 minutes, until the edges are set and the tops look dry but the centers remain soft.
- Cool each batch on the baking sheet for 5 minutes.
- Transfer the cookies to a rack, and let the sheet cool before baking another batch.
- Cool all cookies completely before frosting.
- Beat the cream cheese until smooth.
- Beat in the powdered sugar and milk until the frosting is creamy and spreadable.
- Spread the frosting over the cooled cookies.


