The first thing you notice is how quickly the cocoa smell fills the kitchen, even before the milk is hot. I used to dump everything into the saucepan at once and chase little cocoa clumps around with the whisk. For Norwegian hot chocolate, I start with a smooth cocoa paste instead; it gives the drink an even, chocolatey taste without leaving dry pockets behind.
Unsweetened cocoa brings a deep chocolate flavor, while finely chopped semisweet chocolate melts into the milk and gives each mug a richer, silkier feel. The two do different jobs, and neither has to carry the whole drink alone. Keep the heat at medium and whisk often as the chocolate melts. Once the mixture is steaming, take it off the burner before it boils, stir in the vanilla, and pour it while it’s hot.
Kitchen Note
Finely chopped chocolate melts much more evenly than big chunks. Take a minute to chop it small, especially if the chocolate is firm, so you’re not waiting on a few stubborn pieces while the milk heats.
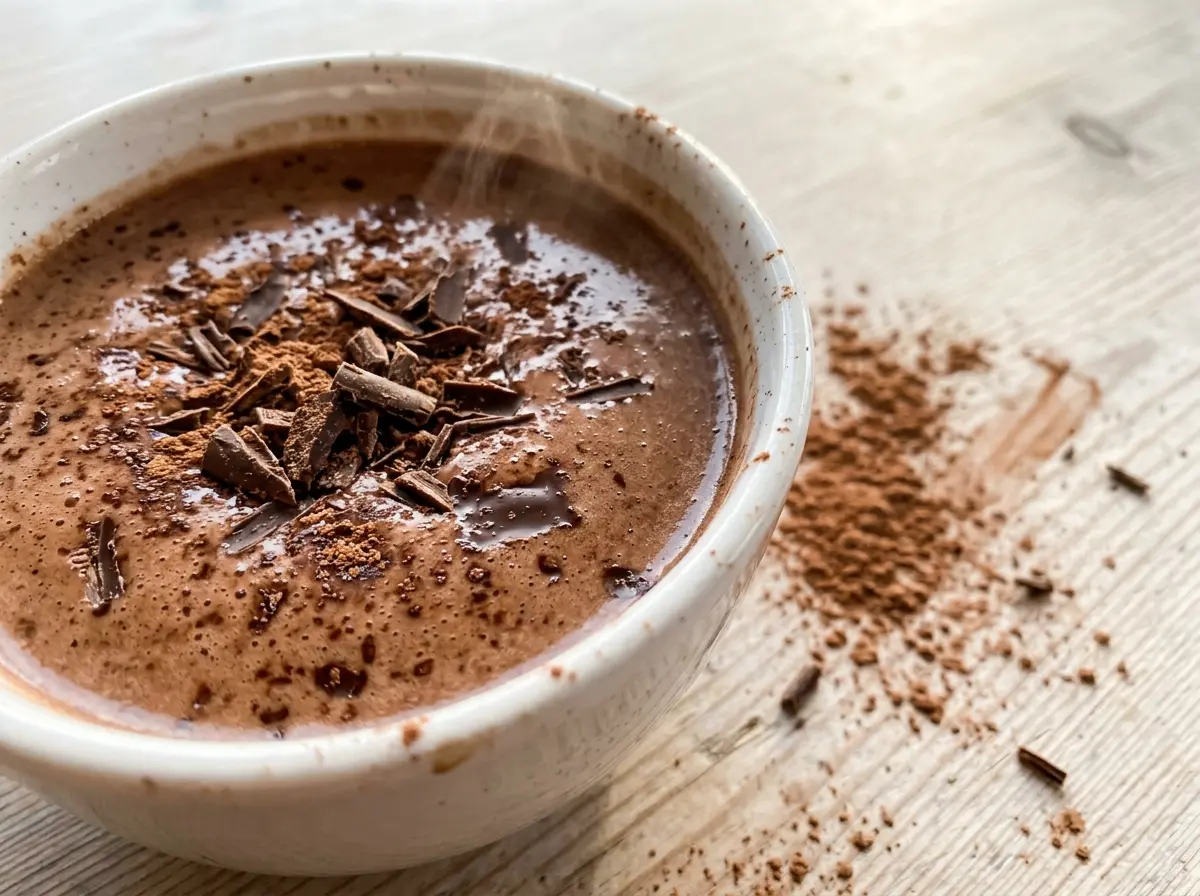
Save this Norwegian hot chocolate for a cozy mug with deep cocoa flavor and melted semisweet chocolate.
Why Cocoa Needs a Head Start Before the Milk Goes In
Cocoa powder doesn’t dissolve in milk as readily as sugar does. If you add all the milk at once, the cocoa tends to float, clump, and cling to the sides of the pan, so you can end up with a drink that tastes uneven from sip to sip. A small amount of liquid gives you room to work those dry ingredients into a smooth paste before the pan gets full.
That first whisking also gives the sugar and salt a chance to disperse through the cocoa instead of settling in one spot. When the remaining milk goes in gradually, the smooth base loosens without turning into a thin mixture full of cocoa islands. It’s a small bit of attention at the start, but it saves you from trying to fix lumps later, when the chocolate is melting and the saucepan is already warm.
Think of the first mixture as the foundation for the whole mug, not an extra step. It should look uniform before you add the rest of the milk. If you still see dry streaks, keep whisking until they’re gone; don’t move on while cocoa is stuck in the corners of the pan.
How the Cocoa and Chopped Chocolate Make Different Kinds of Richness

- Unsweetened cocoa powder — This supplies the concentrated cocoa taste without adding sweetness. Use plain unsweetened cocoa rather than a packaged hot cocoa mix, which already contains sugar and may include other ingredients that throw off the balance. Dutch-process cocoa can stand in for natural cocoa in a drink like this, though it will taste smoother and less sharp.
- Granulated sugar — Sugar rounds out cocoa’s bitterness and dissolves as the milk warms. Superfine sugar works in the same amount if that’s what you have; it dissolves quickly, but regular granulated sugar is perfectly suitable. Avoid swapping in a sweetened drink mix, since its sweetness is hard to account for precisely.
- Whole milk — Whole milk gives the drink its creamy body. Two-percent milk works as a one-for-one replacement, but the result will be a little lighter. Plant-based options need a separate adjustment to the chocolate as well, so see the dairy-free adaptation below rather than changing only the milk.
- Semisweet chocolate — The chopped chocolate melts into the milk and adds a rounder, fuller texture than cocoa powder alone. A good-quality bar is worth choosing here because chocolate is a main part of every mug, but an everyday semisweet bar works. Bittersweet chocolate can replace it in the same weight for a darker, less sweet cup.
- Vanilla extract — Stirred in off the heat, vanilla adds a soft aromatic note without competing with the chocolate. Vanilla bean paste can replace it in the same amount. If you don’t have either, leaving the vanilla out is better than reaching for a strongly flavored extract that would take over the drink.
From Smooth Cocoa Paste to Steaming Mugs
Whisk the Cocoa Base Until No Dry Patches Remain
In a 2-quart saucepan, whisk together the cocoa powder, sugar, and kosher salt. Gradually whisk in 1/2 cup of the milk, working around the bottom and sides until the mixture is smooth. Pouring slowly gives you control; if you see a dry cocoa pocket, press it against the side of the pan with the whisk and keep mixing. Don’t add the chocolate yet, because the cocoa base needs to be smooth before it gets crowded with other ingredients.
Warm the Milk and Melt the Chocolate Without Boiling
Whisk in the remaining 3 1/2 cups milk and the finely chopped semisweet chocolate. Set the saucepan over medium heat and cook for 5 to 7 minutes, whisking often. Watch for steam rising and chocolate pieces disappearing into the milk; the mixture should be hot and even, not bubbling. If it starts to boil, pull the pan off the heat so the milk doesn’t scorch.
Finish with Vanilla and Pour While Hot
Take the saucepan off the heat before stirring in the vanilla extract. Give the drink a final whisk so the melted chocolate is distributed evenly, then divide it among 4 mugs. Serve it hot, while the surface is smooth and the chocolate is still fully blended. If you’re pouring the last mug after a pause, whisk the saucepan again first.
Three Ways to Change the Chocolate Without Losing the Cozy Mug
Make It Dairy-Free with Oat Milk
Replace the whole milk with an equal amount of unsweetened oat milk, and use dairy-free semisweet chocolate in place of the regular chocolate. The cocoa, sugar, salt, and vanilla stay the same. The drink will be a little less rich than the whole-milk version, so whisk steadily as it warms and stop when it’s steaming rather than letting it boil.
Go Darker with Bittersweet Chocolate
Swap the semisweet chocolate for the same weight of bittersweet chocolate. You’ll get a more intense, less sweet mug, while the cocoa still gives it a strong chocolate base. Choose this when you prefer a darker cup; the drink will taste less mellow than the original.
Add a Little Cinnamon
Whisk a small pinch of ground cinnamon into the cocoa, sugar, and salt before adding the first splash of milk. It gives the finished drink a gentle warm spice without changing the method. Start with just a pinch so cinnamon supports the chocolate instead of covering it.
Storage and Reheating
- Refrigerator: Cool promptly, cover, and refrigerate for up to 3 days. The chocolate may settle or thicken as it chills.
- Freezer: Freezing isn’t recommended; milk and melted chocolate can separate and turn grainy when thawed.
- Reheating: Warm gently in a saucepan over low heat, whisking until smooth and steaming. Don’t crank up the heat or let it boil, which can scorch the milk.
Questions That Come Up When Making Norwegian Hot Chocolate
Norwegian Hot Chocolate
Ingredients
Equipment
Method
- In a 2-quart saucepan, whisk together the cocoa powder, sugar, and salt; gradually whisk in 1/2 cup of the milk until smooth.
- Whisk in the remaining 3 1/2 cups milk and the chocolate.
- Heat over medium heat for 5 to 7 minutes, whisking often, until steaming and the chocolate is melted; do not let it boil.
- Remove the saucepan from the heat and stir in the vanilla extract.
- Divide among 4 mugs and serve hot.


