When cocoa powder first meets cold milk, it likes to float in dry little islands instead of blending in. I used to pour everything into the saucepan at once and chase those specks around with a whisk; starting with a small, thick cocoa paste is much easier. That’s the first move in this Healthy Hot Chocolate, and it gives you a smooth drink without needing a blender or special equipment.
The rest is a gentle stovetop warm-up: milk, a little pure maple syrup, a pinch of salt, and vanilla stirred in after the pan comes off the heat. There’s no packaged mix here, so the cocoa tastes clear and chocolatey rather than overly sweet. Keep the heat moderate and stop when the milk is steaming. The finished mugs are warm, smooth, and easy to adjust at the table.
Kitchen Note
Give the cocoa, maple syrup, salt, and first splash of milk a proper whisk before adding the rest of the milk. I look for a glossy, lump-free paste; if you pour in all the milk first, dry cocoa clumps take more work to chase down.
Save this Healthy Hot Chocolate for a smooth, cocoa-forward mug sweetened with maple syrup, not a packet mix.
Why You Want Steaming Milk, Not a Boiling Pan
Milk can go from pleasantly hot to bubbling quickly, and a rolling boil isn’t needed to make cocoa. Boiling can make the drink foam up in the pan, and intense heat makes milk more likely to catch on the bottom if you stop whisking. Medium heat gives you time to watch the surface and take the saucepan off at the right moment.
Look for steady wisps of steam rising from the milk. The surface should be hot and moving gently as you whisk, but it shouldn’t bubble vigorously. That visual cue matters more than trying to stretch the listed cook time: the recipe takes 3 to 5 minutes, and the exact moment it steams depends on your burner and saucepan. Keep the whisk moving often so the cocoa stays distributed rather than settling while the milk warms.
If you see bubbles gathering at the edge or the milk starts to froth up, take the pan off the burner. You don’t need to bring it back to a boil to get a hot drink; the vanilla goes in after heating, and the mugs are ready once everything is steaming and smooth.
What the Cocoa, Maple, and Milk Each Bring to the Mug

- Unsweetened cocoa powder — This is the chocolate base, so choose plain cocoa rather than a sweetened hot cocoa mix. A fresh, fragrant cocoa gives the drink a cleaner chocolate taste; there’s no need to buy a specialty brand. Whisk it into the small amount of milk first, where you can work out the dry pockets before thinning the mixture.
- Pure maple syrup — Maple syrup sweetens the cocoa while adding a gentle, rounded note. Pure maple syrup is worth using here because it’s the named sweetener and blends readily into the warm drink. Imitation pancake syrup has a different flavor and can make the cocoa taste more like breakfast syrup than chocolate.
- 2% milk — Milk supplies the body of the drink and softens cocoa’s bitterness. The 2% version makes a smooth, familiar mug without the extra richness of whole milk. Keep it cold for the initial paste, then whisk in the remaining milk so the cocoa mixture loosens evenly.
- Vanilla extract — Vanilla rounds out the cocoa and maple without turning the drink into a vanilla-forward beverage. Pure extract is a good choice when you have it, but the small amount means a standard vanilla extract also works. Stir it in only after removing the saucepan from the heat so its aroma stays noticeable.
- Fine salt — A pinch helps the cocoa taste fuller and keeps the sweetness from seeming one-dimensional. Fine salt disperses quickly through the small paste, so you won’t get a salty bite in one spot. It’s a small ingredient, but don’t leave it out if you want the flavors to taste balanced.
Build the Cocoa Paste Before Warming the Milk
Whisk the Small, Smooth Base
Put the cocoa powder, maple syrup, fine salt, and 1/4 cup of the milk in a small saucepan. Whisk until the mixture looks smooth, with no dry cocoa caught along the bottom or sides. It will be thicker than the finished drink, which is useful: the whisk can reach every bit of cocoa before the rest of the milk goes in. If you spot a dry pocket, keep whisking this base rather than moving on with lumps still in it.
Warm Until Steam Rises
Whisk in the remaining 1 3/4 cups milk, then set the saucepan over medium heat. Warm it for 3 to 5 minutes, whisking often, until you see steam rising from the surface. The cocoa may settle between whisk strokes, so keep moving the whisk across the bottom and through the center. Don’t let the milk boil; the goal is a hot, smooth drink, not a bubbling pan.
Stir in Vanilla Off the Heat
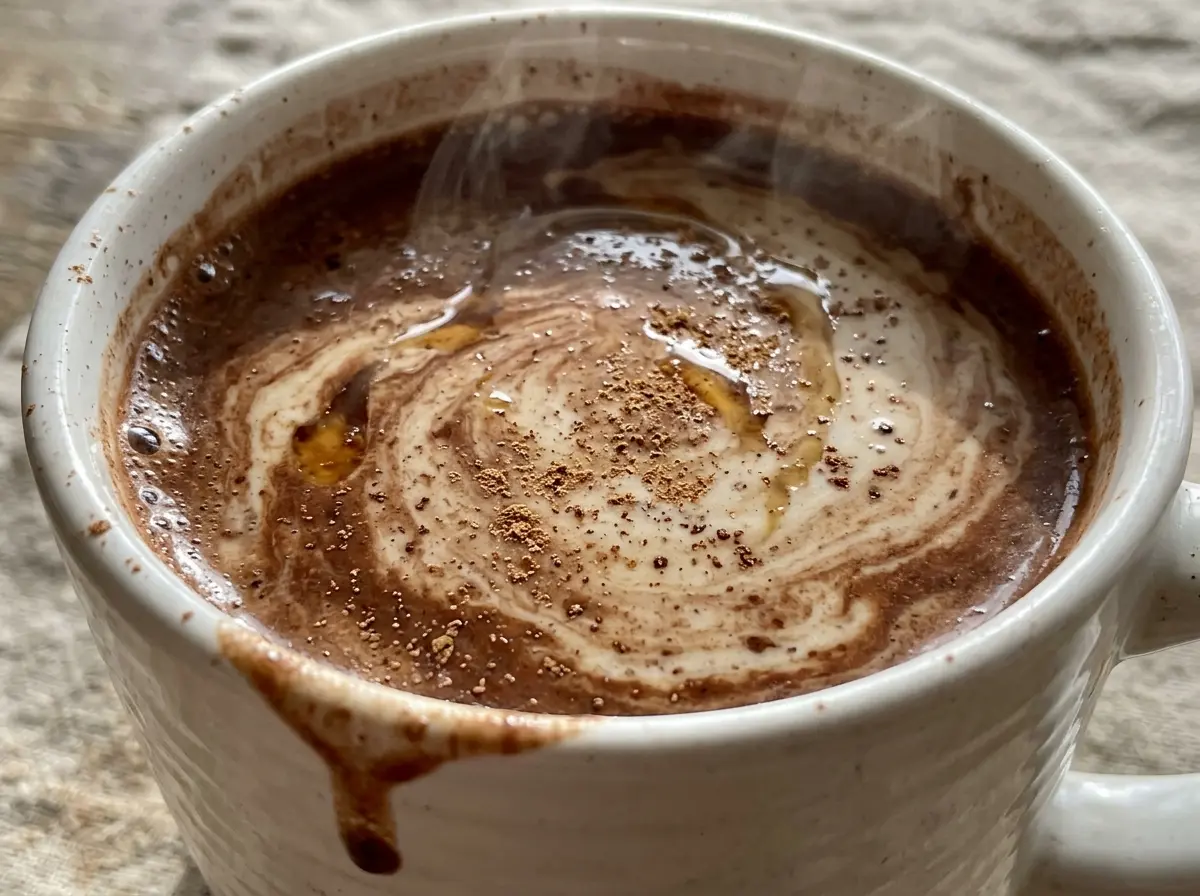
Take the saucepan off the burner once the milk is steaming, then stir in the vanilla extract. The drink should look evenly cocoa-colored rather than streaky, and the vanilla should blend in without a long additional cook. Pour it into two mugs and serve hot. Since the recipe makes two servings, divide the drink between the mugs while it’s freshly warmed.
Easy Ways to Adjust This Mug Without Losing Its Balance
Make It Dairy-Free with Unsweetened Oat Milk
Replace the 2% milk with the same amount of unsweetened oat milk. It warms and blends into the cocoa well, while giving the drink a mild oat flavor and a slightly different, less dairy-rich finish. Choose an unsweetened carton so the maple syrup remains the main sweetener.
Use Whole Milk for a Richer Finish
Swap the 2% milk for whole milk if you want a fuller, creamier sip. Keep the same gentle heating approach and watch for steam rather than waiting for a boil. The cocoa and maple stay in the foreground, but the extra richness makes the drink feel more substantial.
Dial Back the Sweetness
For a more bittersweet cup, start with less maple syrup than the standard version and taste once the drink is hot. Cocoa brands vary in intensity, so this lets you keep the chocolate prominent without changing the milk or adding another sweetener. The tradeoff is a sharper cocoa flavor and a less rounded finish.
Storage and Reheating
- Refrigerator: Refrigerate leftovers in a covered container within 2 hours and use them within 3 days. The cocoa may settle and the milk may separate as it sits.
- Freezer: Freezing isn’t my first choice because thawed milk can separate and leave the drink less smooth. If you do freeze it, thaw it in the refrigerator and whisk thoroughly as it warms.
- Reheating: Warm it gently in a saucepan, whisking until steaming, then take it off the heat. Avoid a hard boil, which can foam up the milk and make it easier to scorch on the bottom.
Questions That Come Up When Making Hot Chocolate
Healthy Hot Chocolate
Ingredients
Equipment
Method
- In a small saucepan, whisk the cocoa powder, maple syrup, salt, and 1/4 cup of the milk until smooth.
- Whisk in the remaining 1 3/4 cups milk and heat over medium heat for 3 to 5 minutes, whisking often, until steaming; do not let it boil.
- Remove the saucepan from the heat, stir in the vanilla extract, and serve hot.


