The caramel mixture starts out pale and loose, then turns glossy and thick as it cooks. That slow change is part of the fun, but it’s also where chewy salted caramels can go wrong: stop cooking too early and they won’t set; let the temperature climb too far and they’ll be hard instead of pleasantly chewy.
I cook the cream, butter, sugar, light corn syrup, and kosher salt together, stirring continuously until the candy thermometer reaches 248°F. The corn syrup helps keep the sugar smooth, while the thermometer gives you a clear endpoint that appearance alone can’t provide. Once the vanilla goes in, the hot caramel pours into an 8-inch square pan and gets a light finish of flaky salt.
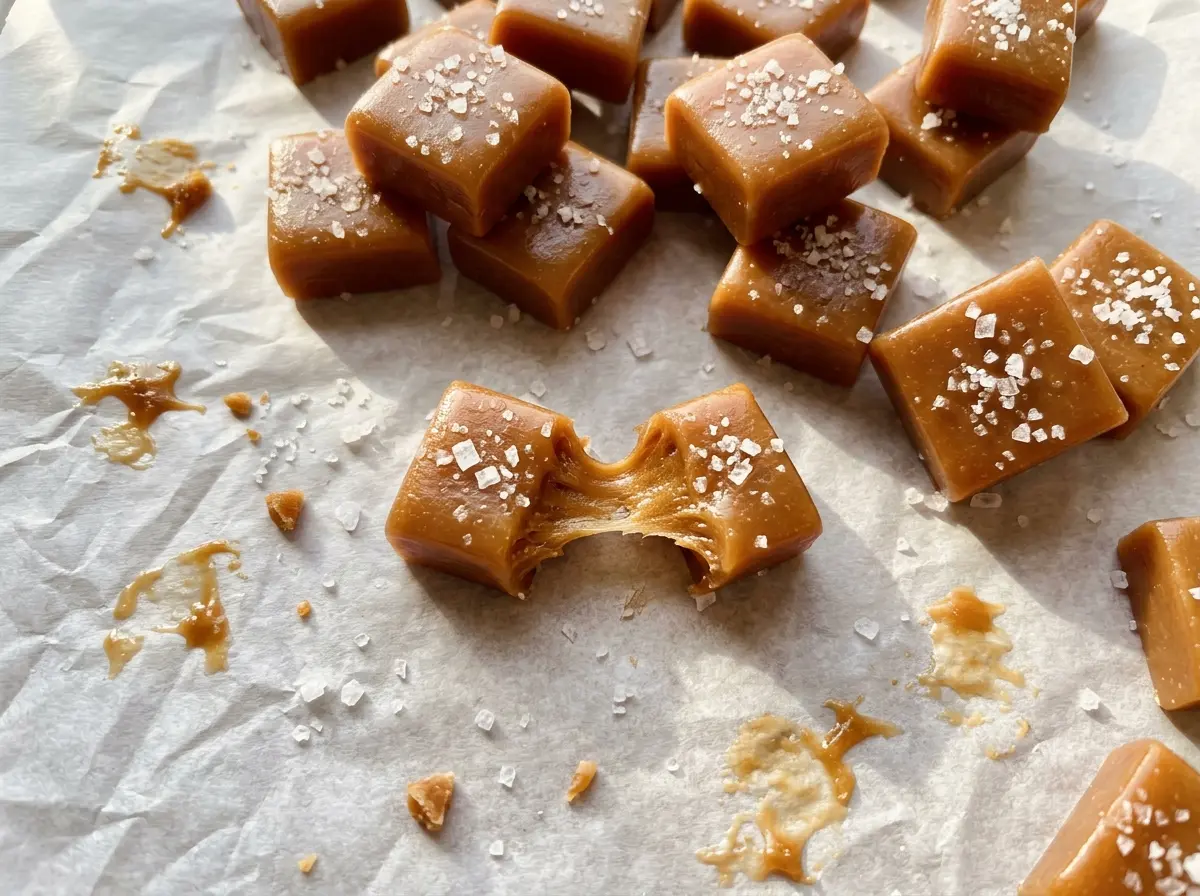
After it firms up at room temperature, the slab cuts into 64 pieces with buttery centers and a crisp little hit of salt on top.
Kitchen Note
Keep the thermometer’s sensing end in the caramel, not resting against the saucepan bottom. Contact with the hot metal can give you a misleading reading right when a few degrees matter.
Save these chewy salted caramels for a homemade candy box — the soft centers and flaky-salt finish make each piece feel special.
Why 248°F Is the Line Between Chewy and Hard Candy
Caramel texture comes down to how much moisture remains in the sugar mixture when it leaves the heat. At 248°F, this batch sets into a chewy candy rather than a soft sauce. A mixture that stops short holds on to more moisture, so the pieces can stay too soft to cut cleanly. Cook it past the target and it loses more moisture, setting firmer and becoming harder to bite.
That’s why I treat the thermometer reading as the endpoint, not a rough suggestion based on how thick the caramel looks. A bubbling mixture can look ready before it has reached the temperature needed to firm up. Keep stirring throughout the cook so the mixture heats evenly, and take it off the burner when the thermometer reads 248°F. The candy will continue to be hot as you stir in the vanilla and pour, so have the lined pan ready before you start cooking.
This balance is what gives the finished pieces their chew: firm enough to lift and cut, but not brittle or hard. The slow cook takes about 20 to 30 minutes, and staying with the pan is more useful than trying to rush it with higher heat.
What the Cream, Corn Syrup, and Salts Each Contribute

- Heavy cream — It brings the dairy richness and moisture that make these caramels soft and chewy. Milk or half-and-half won’t provide the same fat, so there isn’t a simple swap that keeps the same texture. Standard heavy cream is fine; there’s no need to seek out a specialty brand.
- Unsalted butter — Butter rounds out the cooked sugar with a creamy taste. Unsalted butter also lets you control the salt in the base separately from the flakes on top. If salted butter is what you have, leave out the kosher salt in the caramel mixture; the finished candy will taste a little less precisely seasoned because salted butters vary.
- Granulated sugar — Regular white granulated sugar gives the caramel its structure and clean sweetness. A standard bag works well here; specialty sugars bring different moisture and flavor, so they’re not a useful upgrade for this batch.
- Light corn syrup — This helps keep the sugar mixture smooth as it cooks and supports a chewy set. Stick with light corn syrup for the intended mild sweetness; dark corn syrup brings a more pronounced molasses-like flavor.
- Vanilla extract — Stirring it in after the pan comes off the heat keeps its aroma from being cooked away during the long boil. A familiar grocery-store vanilla works; the difference between brands is more noticeable in aroma than in how the caramels set.
- Kosher salt and flaky sea salt — The kosher salt seasons the caramel throughout, while flaky sea salt adds a distinct salty crunch on the surface. Fine table salt doesn’t give you the same crisp flakes as a topping, so use flaky salt for that final scatter.
From a Smooth Boil to a Clean Cut
Line the pan before the caramel cooks
Line an 8-inch square metal baking pan with parchment, leaving enough overhang to lift the slab out later. Set the pan close to the stove so you don’t have to carry hot caramel across the kitchen. Parchment gives you a clean way to release the set candy without digging at the corners.
Dissolve the sugar before the boil
Combine the cream, butter, sugar, corn syrup, and kosher salt in a 4-quart heavy-bottomed saucepan over medium heat. Stir until the butter has melted and the sugar has dissolved; the mixture should look even rather than sandy. Once it comes to a boil, lower the heat to medium-low. Starting with the sugar dissolved gives the caramel a smooth beginning.
Stir steadily to the thermometer mark
Keep stirring continuously over medium-low heat while the caramel cooks. It takes about 20 to 30 minutes to reach 248°F, so stay nearby and keep the thermometer positioned in the mixture. Don’t rely on a darker color or thicker bubbles as a substitute for the temperature reading. Remove the pan from the heat as soon as it reaches the target.
Pour, finish, and let the slab firm
Stir in the vanilla, then carefully pour the caramel into the prepared pan. Sprinkle the flaky sea salt evenly over the surface while the caramel is still warm enough for the flakes to stay in place. Leave the pan at room temperature until the caramel is fully firm, at least 4 hours. Lift it out by the parchment overhang and cut it into 64 pieces with a sharp knife.
Three Small Changes to the Salted Caramel Finish
Use salted butter for a saltier base
Replace the unsalted butter with salted butter and leave the kosher salt out of the caramel mixture. Keep the flaky sea salt on top for contrast. Since salt levels differ among butter brands, the base may taste a little more or less seasoned.
Leave off the flaky-salt topping
Skip the flaky sea salt and keep the rest of the caramel unchanged for a smooth-topped, less salty piece. You’ll still get the gentle seasoning from the kosher salt in the candy, but lose the crisp finish.
Cut narrow caramel batons
For slender rectangles instead of small squares, cut the set slab into 4 long sections in one direction, then divide each section into 16 pieces across the other direction. You’ll still have 64 pieces, but the thinner shape is easy to tuck into a candy tin.
Storage and Reheating
- Room temperature: Wrap pieces individually in parchment or wax paper and store them in an airtight container in a cool, dry spot for up to 2 weeks.
- Freezer: Wrapped caramels freeze well for up to 3 months in an airtight freezer container. Thaw them while still wrapped to limit condensation on the candy.
- Reheating: These candies don’t need reheating. If they’re chilled or frozen, let them come to room temperature while wrapped; microwaving can make the outside sticky and the center too soft.
Questions That Come Up When Making Chewy Salted Caramels
Chewy Salted Caramels
Ingredients
Equipment
Method
- Line an 8-inch square metal baking pan with parchment paper, leaving enough overhang to lift the caramels out later.
- Combine the heavy cream, butter, sugar, corn syrup, and kosher salt in a 4-quart heavy-bottomed saucepan over medium heat, stirring until the butter melts and the sugar dissolves.
- Bring the mixture to a boil, then cook over medium-low heat, stirring continuously, until a candy thermometer reads 248°F, about 20 to 30 minutes.
- Remove the pan from the heat.
- Stir in the vanilla extract.
- Carefully pour the caramel into the prepared pan.
- Sprinkle the flaky sea salt evenly over the caramel.
- Let it cool at room temperature until fully firm, at least 4 hours.
- Lift the caramel from the pan using the parchment overhang.
- Cut it into 64 pieces with a sharp knife.


