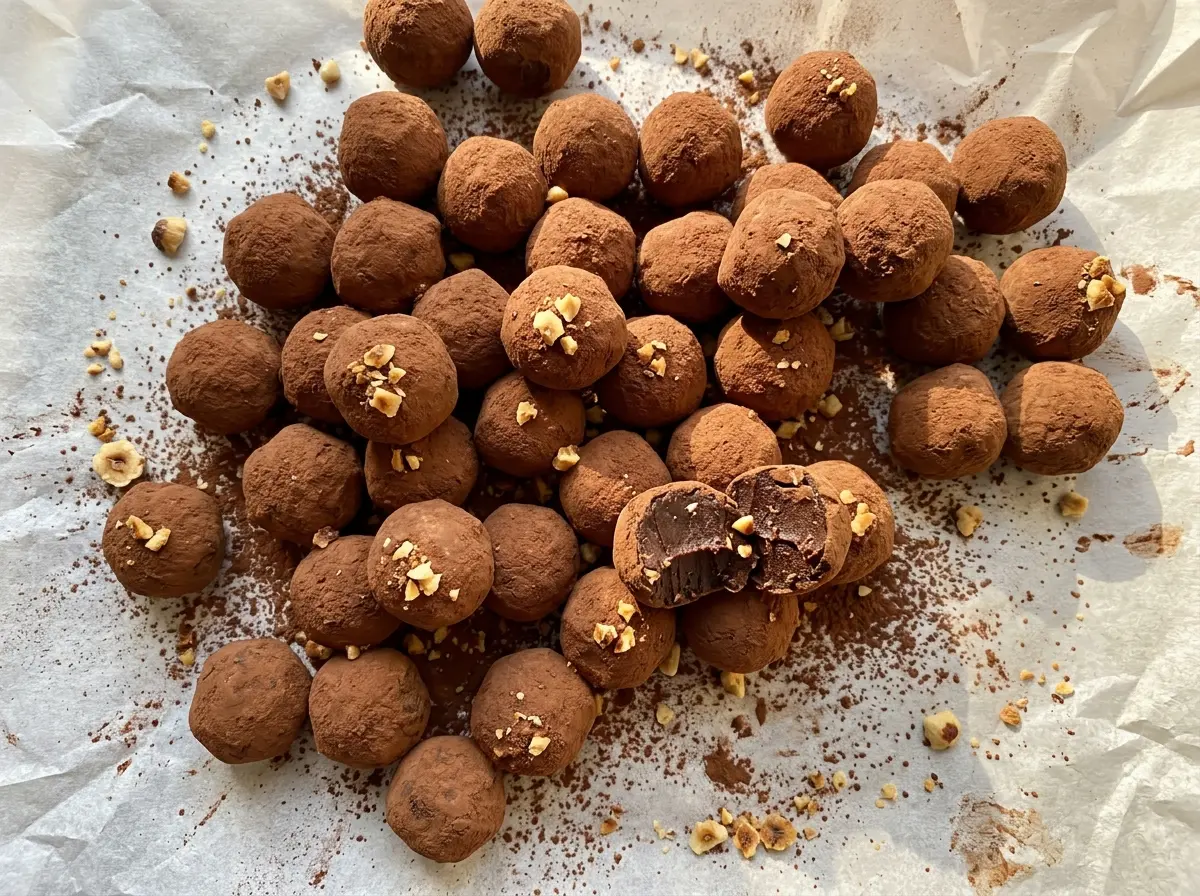
When hot cream hits finely chopped chocolate, the pieces still look stubbornly solid for a moment. Let them sit undisturbed, and they soften into a glossy ganache that’s rich enough to hold its shape but still soft when you bite in. That’s the starting point for these Chocolate Hazelnut Truffles, with chocolate-hazelnut spread folded in for a round, nutty sweetness and toasted hazelnuts tucked through the center.
I like this method because the truffle mixture comes together in one bowl, but each step has a job: the cream melts the chocolate, the spread and butter enrich it, and a long chill makes it easy to portion. Finely chopped nuts give the smooth center a little crunch without making the truffles difficult to roll. A light cocoa coating keeps each bite from feeling too sweet, and the finished truffles are tender in the middle with a soft, bittersweet finish.
Kitchen Note
Use softened butter, not butter straight from the refrigerator. Cold butter can linger in small pieces instead of blending into the ganache, so give it time to soften before you start.
Save these Chocolate Hazelnut Truffles for a homemade chocolate treat with a soft center, toasted hazelnut crunch, and a cocoa-dusted finish.
Why the Truffles Need a Second Chill After Rolling
The first chill firms the ganache enough to scoop and roll. That isn’t quite the end of the setting process: rolling the portions between your palms warms their surface, and cocoa powder can make that soft exterior feel a little dusty or smudged. The final refrigerator rest firms the outside again, so the truffles hold their round shape when you lift them from the tray.
Think of the two chills as serving different purposes, rather than one long wait. The first gets the chocolate mixture ready to handle; the second settles the freshly rolled, cocoa-coated truffles. If you skip the last rest, the centers may still taste good, but the balls will be softer to pick up and the coating can shift more easily. Once chilled, the cocoa forms a neat, delicate finish around the truffle instead of a loose layer that rubs off at the first touch.
What Each Ingredient Brings to the Hazelnut-Chocolate Center

- Bittersweet chocolate — A bar is easy to chop finely and melts evenly under the hot cream. Choose chocolate in the specified 60% to 70% range; chips are less predictable here because they’re made to hold their shape. A good everyday bar works well, so there’s no need for a specialty chocolate.
- Heavy cream — Its fat gives the ganache a rich, smooth texture and helps it set after chilling. Half-and-half or milk doesn’t have the same richness, so it isn’t a dependable one-for-one swap in this mixture.
- Chocolate-hazelnut spread — This supplies the recognizable hazelnut flavor and extra sweetness. Use a smooth spread that you enjoy eating; a plain nut butter won’t provide the same chocolate flavor or sweetness, and it changes the character of the truffles.
- Unsalted butter — It adds richness without bringing an unknown amount of salt. Unsalted butter is widely available and keeps the seasoning predictable alongside the fine salt.
- Toasted hazelnuts — Toasting gives the nuts a fuller, nuttier taste than raw hazelnuts, while fine chopping spreads their crunch through each bite. Buy them already toasted if that’s convenient, then chop them finely before folding them in.
- Unsweetened cocoa powder — The unsweetened coating balances the sweet center and gives the truffles their classic matte finish. A standard grocery-store cocoa works; sweetened drinking cocoa isn’t a substitute for it.
Building the Ganache and Rolling Neat Truffles
Warm the Cream and Soften the Chocolate
Finely chop the bittersweet chocolate and place it in a 2-quart heatproof bowl. Heat the heavy cream in a 1-quart saucepan over medium heat until it’s steaming and small bubbles appear around the edges, about 2 to 3 minutes. Pour the hot cream over the chocolate and leave it alone for 5 minutes. That rest gives the chocolate time to soften before you stir.
Stir in the Hazelnut Spread and Nuts
Stir the chocolate and cream until the mixture looks smooth, with no visible pieces of chocolate remaining. Stir in the chocolate-hazelnut spread, softened butter, and fine salt until everything is fully combined. Fold in the finely chopped toasted hazelnuts, keeping the mixture even from edge to edge. If you spot a chocolate fleck before adding the other ingredients, keep stirring until the base is smooth.
Chill Until the Ganache Holds Its Shape
Cover the bowl and refrigerate the mixture until it’s firm enough to scoop, about 1 1/2 to 2 hours. The surface should look set rather than glossy and loose, and a spoonful should hold together when lifted. Don’t start shaping while the center is still soft and flowing; it will smear instead of forming into a ball. The goal is a chilled, workable ganache, not a frozen one.
Roll, Coat, and Firm the Truffles
Line a 9×13-inch rimmed baking sheet with parchment paper, then put the unsweetened cocoa powder in a shallow bowl. Scoop the mixture into 1-tablespoon portions and roll each portion between your palms into a ball, arranging the truffles on the prepared sheet. Roll each one in cocoa powder and shake off the excess so the coating stays light rather than chalky. Refrigerate the coated truffles for 20 minutes, until firm.
Small Changes for a Different Chocolate Hazelnut Truffle
Choose 70% Chocolate for a More Bittersweet Finish
Use bittersweet chocolate at the upper end of the specified range for a deeper cocoa taste and a less sweet impression. The truffles will still have the hazelnut-spread flavor, but the chocolate will stand out more clearly.
Use Dutch-Process Cocoa for a Darker Coat
Swap the unsweetened cocoa powder for unsweetened Dutch-process cocoa powder in the coating. It gives the outside a darker, rounder cocoa taste without changing the ganache or the rolling method.
Make a Gluten-Free Batch
Choose gluten-free-certified bittersweet chocolate and chocolate-hazelnut spread instead of products that aren’t certified. Keep the same ingredients and method otherwise; a smooth replacement spread keeps the truffle center close to its usual texture.
Storage and Serving
- Refrigerator: Keep the truffles in an airtight container for up to 4 days. The cocoa coating may darken or look a little patchy as it takes on moisture.
- Freezer: Freeze them in a single layer until firm, then transfer to an airtight container for up to 2 months. Thaw overnight in the refrigerator while covered to limit condensation on the cocoa.
- Serving: These don’t need reheating. Let a truffle sit out briefly before eating if you prefer a softer center, and keep the rest chilled.
Questions That Come Up When Making These Truffles
Chocolate Hazelnut Truffles
Ingredients
Equipment
Method
- Place the chocolate in a 2-quart heatproof bowl.
- Heat the cream in a 1-quart saucepan over medium heat until steaming with small bubbles at the edges, 2 to 3 minutes.
- Pour the hot cream over the chocolate and let stand for 5 minutes.
- Stir until smooth, then stir in the chocolate-hazelnut spread, butter, and salt until fully combined.
- Fold in the hazelnuts.
- Cover and refrigerate until firm enough to scoop, 1 1/2 to 2 hours.
- Line a 9x13-inch rimmed baking sheet with parchment paper.
- Put the cocoa powder in a shallow bowl.
- Scoop the mixture into 1-tablespoon portions, roll each between your palms into a ball, and arrange them on the prepared baking sheet.
- Roll the truffles in the cocoa powder to coat, shaking off the excess.
- Refrigerate for 20 minutes until firm.


