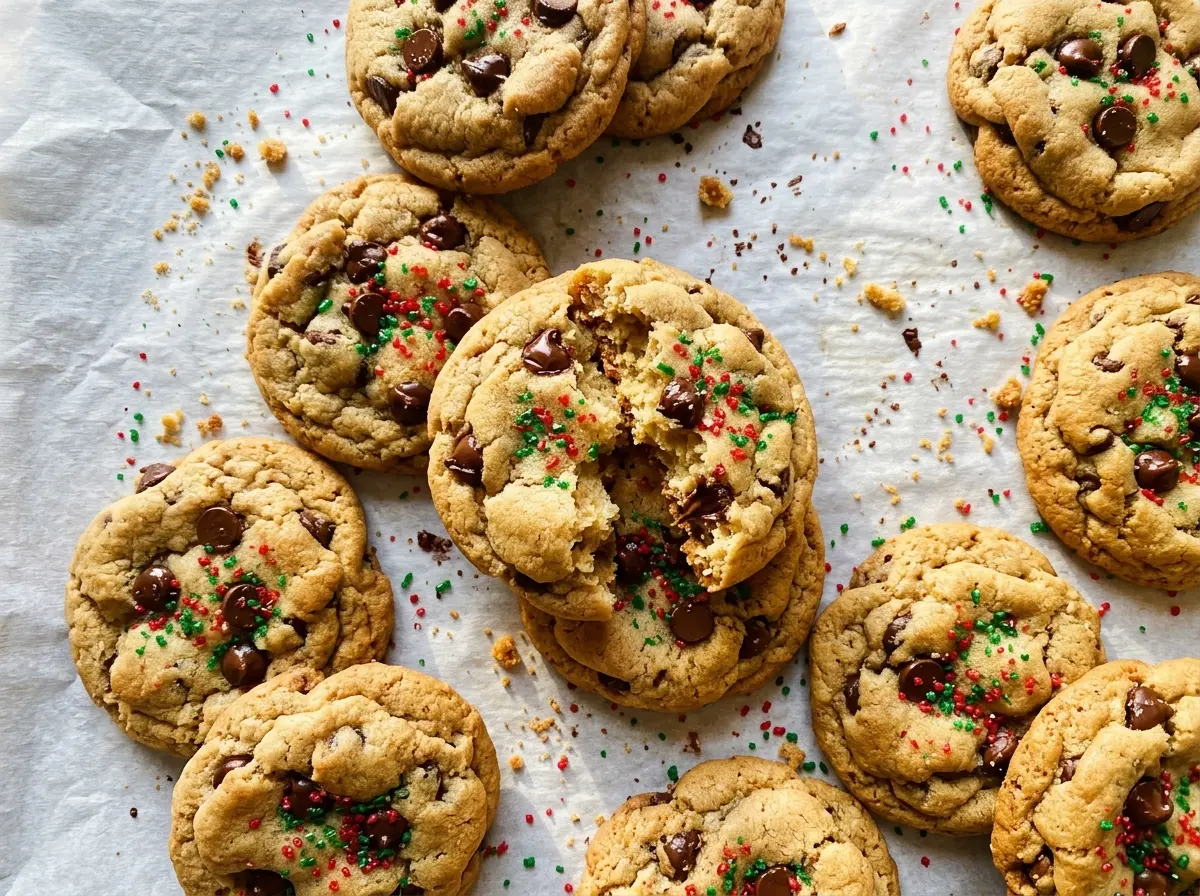
The edges turn golden while the centers still look soft, and the whole kitchen smells like warm butter and chocolate. That’s the moment I look for with these Christmas Chocolate Chip Cookies: they’ll finish setting on the baking sheet without losing their soft middle.
Softened butter and a short creaming time give the dough a smooth start, while the chocolate chips and candy-coated chocolates make each scoop a little different. I fold the colorful candies in by hand at the end, so they stay whole and show up clearly in the baked cookies.
This batch makes 36 cookies, which is handy when you want enough for a cookie tin or a holiday dessert table. The combination of semisweet chocolate and crunchy red and green candies gives each cookie a familiar chocolate-chip center with a festive finish.
Kitchen Note
Fold the candy-coated chocolates in by hand at the end instead of running the mixer again. That keeps the candy shells intact and the red and green pieces distinct in the finished cookies.
Save these Christmas Chocolate Chip Cookies for a colorful holiday cookie tin, with soft centers and red and green candy in every batch.
Why the Brown and White Sugars Give These Cookies Two Textures
Using both brown sugar and granulated sugar gives the cookies more going on than sweetness alone. Packed light brown sugar brings a little molasses flavor and helps the centers stay tender. Granulated sugar supports spread and helps the edges turn golden as the cookies bake. Together, they make a cookie that has a soft middle and a more set edge instead of one uniform texture.
The balance matters, so I keep the two sugars in equal amounts rather than swapping one out entirely. Use packed brown sugar so you get a consistent measure from batch to batch. There’s no need for a specialty brand; ordinary granulated sugar and fresh, soft brown sugar work well. If the brown sugar has hardened into lumps, break them up before beating so they cream evenly with the butter. A few small lumps can carry through into the dough and make the finished texture less consistent.
Why the Semisweet Chips and Candy Shells Belong Together

- Unsalted butter — Softened butter creams smoothly with the sugars and gives the dough its rich base. Standard grocery-store butter is fine; it doesn’t need to be a premium brand. If salted butter is what you have, use the adjustment in the FAQ rather than adding the full amount of salt unchanged.
- Light brown sugar and granulated sugar — Their different textures and flavors shape the cookie’s tender center and golden edges. Fresh brown sugar is easier to blend than a dried-out bag, but the everyday pantry brands work. Dark brown sugar can stand in for light brown if you want a deeper molasses note.
- Eggs and vanilla — The eggs bind the dough and add structure, so large eggs are the right size for this batch. Pure vanilla extract gives a rounded aroma; vanilla bean paste is a useful swap in the same amount, with visible flecks in the dough.
- All-purpose flour and baking soda — All-purpose flour gives these cookies their familiar structure, and baking soda helps them spread and brown. Regular all-purpose flour is the right buy here; a specialty high-protein flour isn’t needed. For a gluten-free batch, use the baking blend described below rather than replacing the flour with almond or coconut flour.
- Semisweet chocolate chips — Their bittersweet edge keeps the candy-coated chocolates from making every bite taste sugary. Store-brand chips work just as well as pricier ones. Dark chocolate chips make a less-sweet, deeper-tasting swap.
- Red and green candy-coated chocolates — The crisp shell adds a little crunch and provides the holiday color. A regular bag is all you need. If you’d rather skip the candy, replace it with more chocolate chips and expect a softer, less crunchy cookie without the bright color.
Mixing and Baking the Dough Without Overworking It
Set Up the Oven and Dry Mix
Heat the oven to 375°F and line two large baking sheets with parchment paper. Whisk the flour, baking soda, and salt together in a medium bowl so the leavener is spread through the flour. This quick whisk prevents a concentrated patch of baking soda from landing in one part of the dough. Keep the dry bowl nearby for the next stage.
Cream the Butter and Sugars
In a large bowl, beat the softened butter with both sugars until creamy, about 2 minutes. Scrape the bowl if butter or sugar is clinging to the sides, then beat in the eggs one at a time. Mix in the vanilla after the eggs are incorporated. The mixture should look cohesive rather than streaked with butter.
Add the Flour and Chocolate
Add the flour mixture and mix on low just until no dry streaks remain. If you keep beating after the flour disappears, the dough gets more mixing than it needs. Fold in the semisweet chocolate chips and the candy-coated chocolates until they’re distributed through the dough. Stop once the add-ins are spread around rather than continuing to stir.
Scoop and Bake One Sheet at a Time
Scoop rounded 1 1/2-tablespoon portions and space them about 2 inches apart on the prepared sheets. Bake one sheet at a time for 9–11 minutes; the edges should be golden while the centers still look soft. Don’t wait for the centers to look firm in the oven, or the cookies can bake past that tender middle as they cool. Keep the second sheet ready while the first one bakes.
Let the Cookies Set on the Sheet
Leave the baked cookies on the baking sheet for 5 minutes before moving them. They’re fragile straight from the oven, and that brief rest lets them firm up enough to transfer without breaking. Use a thin spatula to move them to a wire rack, then let them cool completely. The centers will settle as they cool.
Easy Ways to Change the Chocolate or Make a Gluten-Free Batch
Use Dark Chocolate for a Less-Sweet Bite
Swap the semisweet chocolate chips for dark chocolate chips in the same amount. The darker chocolate cuts through the candy’s sweetness and gives the cookies a more intense cocoa flavor without changing the method.
Make Them Without Candy-Coated Chocolates
Replace the red and green candies with an equal amount of additional semisweet chocolate chips. You’ll keep the chocolate-forward taste, but the cookies won’t have the candy shells’ crunch or their bright holiday color.
Make a Gluten-Free Version
Replace the all-purpose flour with a cup-for-cup gluten-free baking blend made for cookies. Choose a blend that includes xanthan gum, or follow the blend’s package guidance if it already contains a binder. The texture may be a little more delicate, so let the cookies set on the baking sheet before transferring them.
Storage and Reheating
- Refrigerator: Store cooled cookies in an airtight container for up to 1 week; they’ll become firmer and less tender in the cold.
- Freezer: Freeze fully cooled cookies in an airtight freezer-safe container for up to 2 months, with parchment between layers to prevent sticking. Thaw at room temperature.
- Reheating: Warm a cookie in the microwave for about 5–8 seconds if you want the chocolate soft again. Longer heating can make it tough once it cools.
Questions That Come Up While Making These Cookies
Christmas Chocolate Chip Cookies
Ingredients
Equipment
Method
- Heat the oven to 375°F and line two large baking sheets with parchment paper.
- In a medium bowl, whisk together the flour, baking soda, and salt.
- In a large bowl, beat the softened butter, brown sugar, and granulated sugar until creamy, about 2 minutes.
- Beat in the eggs one at a time, then mix in the vanilla extract.
- Add the flour mixture and mix on low just until no dry streaks remain.
- Fold in the chocolate chips and candy-coated chocolates.
- Scoop the dough into rounded 1 1/2-tablespoon portions, spacing them about 2 inches apart on the prepared baking sheets; bake one sheet at a time for 9–11 minutes, until the edges are golden and the centers still look soft.
- Let the cookies cool on the baking sheet for 5 minutes, then transfer them to a wire rack to cool completely.


