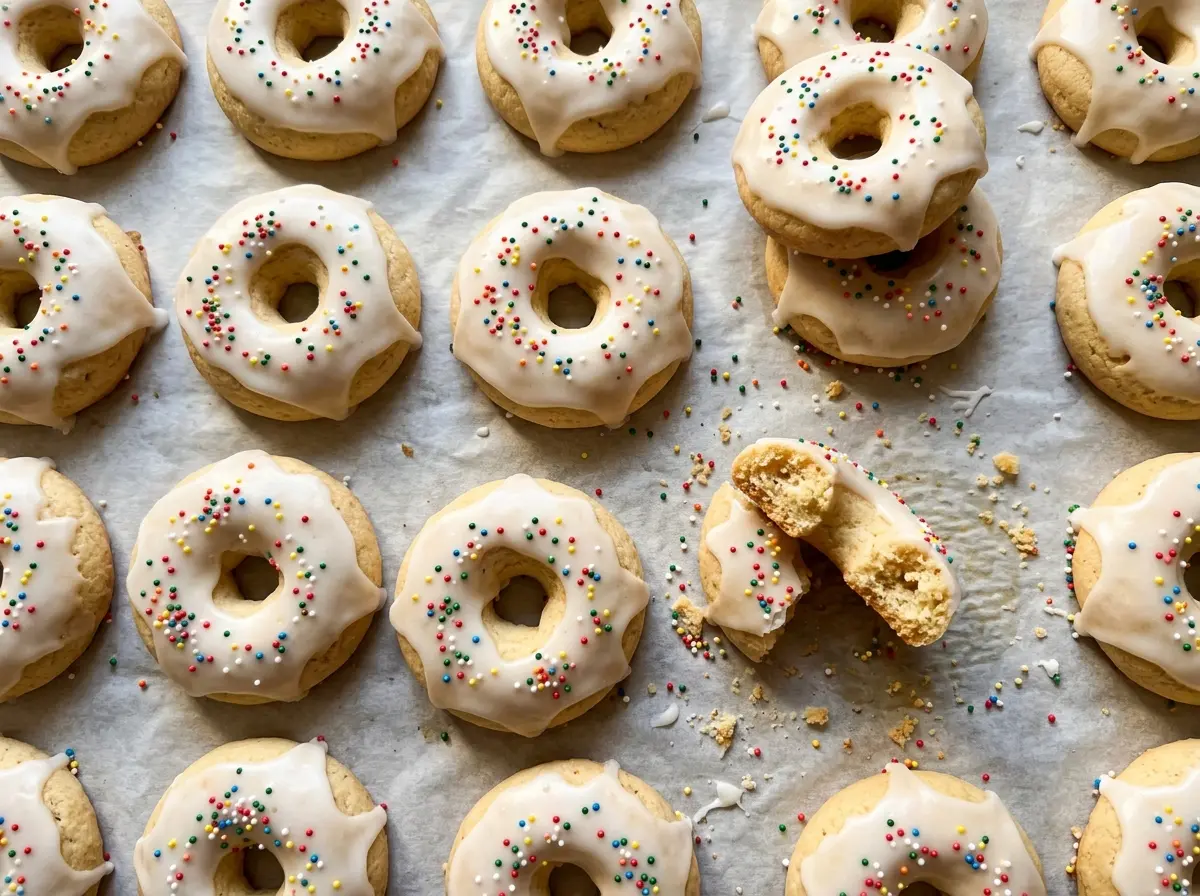
When the bottoms of these little cookies turn lightly golden, their tops can still look pale. That’s exactly the cue I want for Italian Anise Christmas Cookies: set on top, tender inside, and ready before they take on too much color. They’re soft, lightly sweet rounds rather than crisp cookies, with a glaze that gives the nonpareils something to cling to.
Anise extract goes into both the dough and the glaze, so its clean, licorice-like aroma carries through without needing a heavy topping. I keep the mixing gentle once the flour goes in; a soft dough and a light hand help these cookies stay tender. Each one gets a quick dip in the glaze and a shower of sprinkles, leaving a smooth, sweet finish over the anise-scented cookie.
Kitchen Note
Set the nonpareils beside the glaze before you start dipping. The glaze begins to set on the cookie, so having the sprinkles within reach keeps the finish neat and gives them a wet surface to stick to.
Save these Italian Anise Christmas Cookies for a holiday cookie tray: soft, fragrant rounds finished with a sweet glaze and nonpareils.
Why These Cookies Should Come Out Before Their Tops Turn Golden
It’s easy to wait for a cookie to look browned all over, but that isn’t the target here. These cookies rise with baking powder, and their tops are meant to look set while the bottoms pick up just a little color. Waiting for a deep golden top can push the centers past tender before the surface looks the way you expect.
Use the underside as your color check and the top as your set check. A lightly golden base tells you the heat has reached the bottom; a top that no longer looks wet tells you the cookie has had time to set. They’ll continue to settle as they cool on the baking sheet, so don’t treat pale tops as a sign that the whole batch needs extra oven time. The finished cookie should be soft, not browned like a crisp sugar cookie.
The two baking sheets share the upper and lower oven racks, which helps you bake a full batch at once. Switching and rotating them halfway through evens out the exposure, especially if one rack or side of your oven runs warmer. Keeping the bake focused on set tops and lightly golden bottoms gives the glaze a tender cookie underneath instead of a dry one.
What Gives These Cookies Their Anise Aroma and Soft Bite

- All-purpose flour — It gives the dough enough structure to hold its rounded shape while keeping the crumb tender. Spoon it into the measuring cup and level the top rather than packing it down; too much flour can make the cookies dense. A cup-for-cup gluten-free baking blend that includes xanthan gum is the most practical flour swap, though the cookies may be a little more delicate.
- Baking powder — This is the lift that keeps the cookies from baking up heavy. Use a fresh, ordinary canister; baking soda isn’t a direct replacement because it has a different strength and needs an acidic ingredient to work properly.
- Unsalted butter — Softened butter creams with the sugar and gives the dough richness. A standard grocery-store butter works well; it doesn’t need to be a specialty brand. Let it soften enough to indent when pressed, but don’t melt it, or the creaming step won’t build the same light texture.
- Large eggs — The eggs help bind the dough and contribute to its soft, tender structure. Stick with large eggs for the intended balance; changing egg size changes the moisture in a batch this large.
- Anise extract — Extract spreads its distinctive flavor evenly through both dough and glaze, and a regular grocery-store bottle is enough. If you want a familiar, less licorice-forward cookie, vanilla extract is the simplest swap; use the flavor variation below for both portions.
- Powdered sugar and nonpareils — Powdered sugar makes a smooth glaze that coats the curved tops, while nonpareils add a crisp little finish. Store-brand powdered sugar and sprinkles are perfectly suitable here; the glaze’s thickness matters more than a premium label.
Mixing, Baking, and Glazing Without Losing the Tender Texture
Prepare the Pans and Dry Mix
Heat the oven to 350°F and line two 18×13-inch rimmed baking sheets with parchment paper. Whisk the flour, baking powder, and salt together in a medium bowl so the leavener is distributed throughout. That quick whisk prevents pockets of baking powder from landing in a few cookies. Keep the dry mixture nearby for the next stage.
Cream the Butter and Build the Dough
Beat the granulated sugar and softened butter in a large bowl with an electric mixer on medium speed for about 2 minutes, until the mixture looks pale and fluffy. Add the eggs one at a time, beating after each, then mix in the anise extract. Add the flour mixture in three additions, alternating with the milk in two additions, and start and finish with flour. Stop mixing as soon as no dry streaks remain; beating longer can make the cookies tougher.
Portion the Rounds
Scoop the dough into rounded tablespoon portions and roll each portion into a ball. Set the balls 2 inches apart on the prepared sheets so there’s room for them to bake without touching. Keep the portions close in size, since smaller and larger cookies on the same pan won’t finish together. If dough sticks to your hands a little, work gently rather than mixing in extra flour.
Bake Until Set, Then Cool Completely
Bake the sheets on the upper and lower oven racks for 10–12 minutes, switching and rotating them halfway through. Look for set tops and bottoms that are lightly golden; the tops don’t need to brown. Leave the cookies on the baking sheets for 5 minutes, then move them to a wire rack. Let them cool completely before glazing, or the icing will soften and slide instead of coating the tops.
Dip and Decorate
Whisk the powdered sugar, milk, and anise extract in a medium bowl until the glaze is smooth, thick, and still pourable. Dip the top of each cooled cookie into the glaze and let the excess drip back into the bowl. Sprinkle with nonpareils while the glaze is wet, then leave the cookies undisturbed for about 30 minutes so the coating can set. If you stack them before that, the tops can smear against one another.
Three Flavor Changes That Still Suit These Anise Cookies
A Softer Vanilla Finish
Replace the anise extract in both the dough and glaze with vanilla extract, keeping the listed amounts unchanged. You’ll get a gentle vanilla cookie with the same sweet glaze and sprinkle finish, without the distinctive anise note.
A Bright Orange Version
Use orange extract in place of the anise extract in both the dough and glaze, keeping the listed quantities the same. The result is a citrus-scented cookie with a familiar glazed finish; orange extract keeps the flavor consistent without adding juice or changing the dough’s moisture.
A Dairy-Free Batch
Use unsalted plant-based stick butter in place of the butter, and use unsweetened oat milk for the milk in both the dough and glaze, keeping the same quantities. Choose stick-style butter rather than a soft tub spread so the dough has a similar fat content. The cookies will still set and glaze well, though the butter flavor will be less pronounced.
Storage and Reheating
- Refrigerator: Keep the glazed cookies in an airtight container at room temperature for up to 3 days; refrigeration isn’t needed and can make the cookies feel firmer.
- Freezer: Freeze the completely cooled, unglazed cookies in an airtight container with parchment between layers for up to 2 months. Thaw at room temperature, then glaze and add the nonpareils.
- Reheating: These are best served at room temperature, with no reheating needed. Warming glazed cookies can soften the coating and make the sprinkles bleed.
Questions That Come Up While Making Italian Anise Cookies
Italian Anise Christmas Cookies
Ingredients
Equipment
Method
- Heat the oven to 350°F.
- Line two 18x13-inch rimmed baking sheets with parchment paper.
- Whisk the flour, baking powder, and salt together in a medium bowl.
- Beat the granulated sugar and butter in a large bowl with an electric mixer on medium speed until pale and fluffy, about 2 minutes.
- Beat in the eggs one at a time.
- Beat in the anise extract.
- Mix in the flour mixture in three additions, alternating with the milk in two additions, beginning and ending with the flour; mix just until no dry streaks remain.
- Scoop the dough into rounded tablespoon portions.
- Roll the portions into balls.
- Place the balls 2 inches apart on the prepared baking sheets.
- Bake on the upper and lower oven racks for 10–12 minutes, switching and rotating the sheets halfway through, until the tops are set and the bottoms are lightly golden.
- Cool the cookies on the baking sheets for 5 minutes.
- Transfer the cookies to a wire rack and cool completely.
- Whisk the powdered sugar, milk, and anise extract in a medium bowl until smooth and thick but pourable.
- Dip the top of each cooled cookie into the glaze.
- Let excess glaze drip back into the bowl.
- Immediately sprinkle the cookies with nonpareils.
- Let the glaze set for about 30 minutes.


