The chocolate crusts come out of the oven smelling like brownies, but they’re sturdy enough to hold a soft, cool cheesecake filling. I like making these in a muffin pan because each peppermint cheesecake gets its own neat little crust and the portions are ready to serve without slicing.
Room-temperature cream cheese, eggs, and sour cream blend into a smoother filling than cold ingredients do. I beat the cream cheese and sugar until no lumps remain, then add the eggs one at a time and mix the rest just until combined. That keeps the batter creamy without working extra air into it.
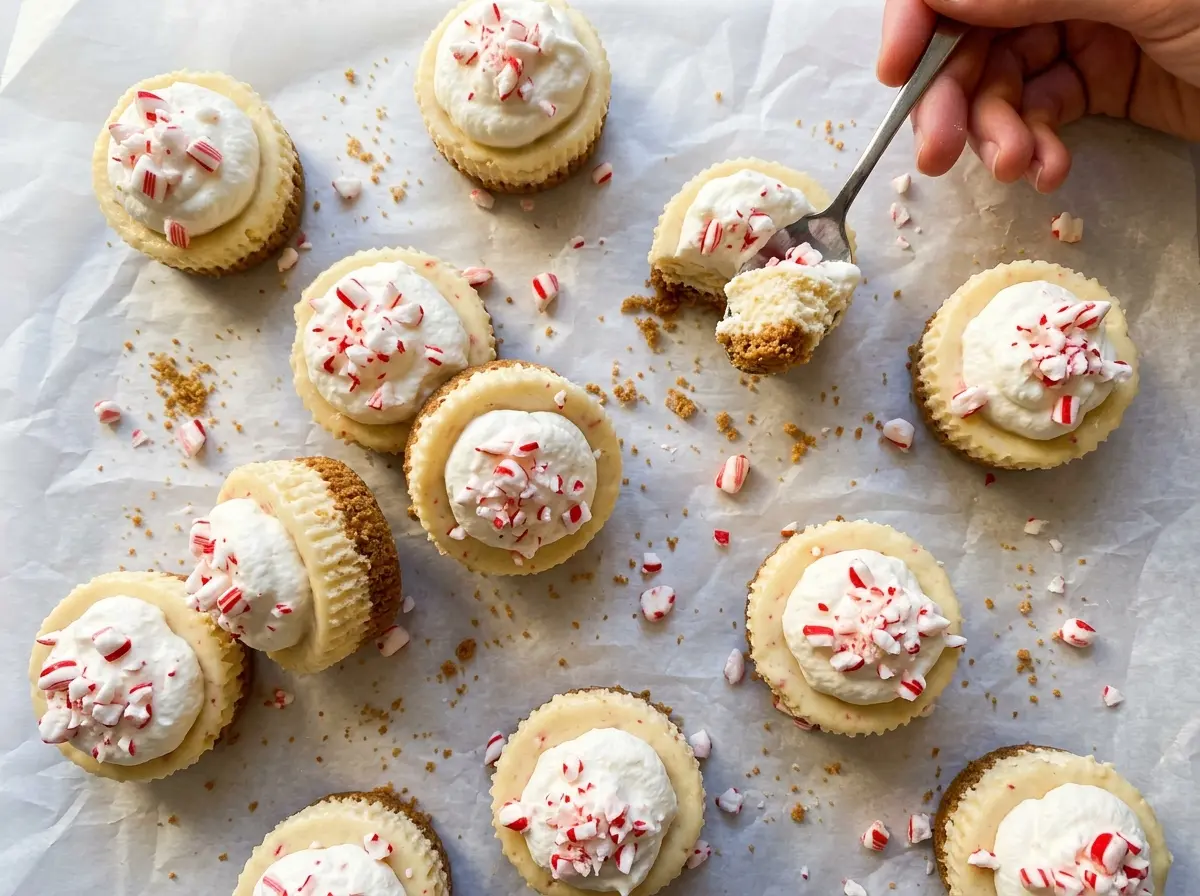
Peppermint extract flavors the filling, while crushed peppermint candies bring a crisp finish on top. After a few hours in the refrigerator, each bite has a firm chocolate base, a cool creamy middle, and a bright little crunch.
Kitchen Note
I wait until the cheesecakes are cold before adding the whipped cream, then sprinkle on the crushed peppermint just before serving. The candy keeps its crisp texture instead of softening against the topping.
Save these peppermint cheesecakes for a make-ahead dessert with chocolate cookie crusts, creamy mint filling, and a crisp candy topping.
Why These Cheesecakes Should Still Jiggle in the Middle
Small cheesecakes bake faster around the edges than they do in the center. If you wait for the whole surface to look firm in the oven, the edges can turn dry while the centers keep baking from the pan’s residual heat. Pull them when the outer ring looks set and the middle still has a slight jiggle; that wobble is a doneness cue, not a sign that the filling is raw.
The individual portions also make cooling important. The cheesecakes continue to settle as they cool in the muffin pan, then firm up fully in the refrigerator. Cutting into one warm won’t show you its final texture, and moving them before they’ve cooled can damage the tender centers. Give them their full chill so the filling slices cleanly and the chocolate crust stays in place.
There’s no water bath here, so the baking window and the visual cue matter more than chasing a perfectly smooth top. A small crack won’t affect the taste, especially once the whipped cream goes on, but stopping at that gentle jiggle helps keep the centers creamy.
How the Chocolate Crust and Peppermint Topping Shape Each Bite

- Chocolate cookie crumbs — Fine crumbs pack into a compact base that holds together under the soft filling. Store-brand crumbs work well; what matters is that they’re evenly crushed so there aren’t loose, oversized pieces. For a gluten-free version, use gluten-free chocolate cookie crumbs in the crust.
- Cream cheese — Use blocks of cream cheese for a rich, stable filling; whipped cream cheese from a tub has a looser texture and can make the batter harder to judge. Let it soften before mixing so it beats smooth rather than leaving little lumps.
- Sour cream and eggs — Sour cream adds a gentle tang that keeps the filling from tasting heavy, while eggs give it structure as it bakes. Room-temperature ingredients blend more evenly. Plain, full-fat Greek yogurt can stand in for sour cream, though the filling will taste a little tangier and may be slightly less silky.
- Peppermint extract and candies — Extract gives the filling a clean mint flavor without changing its texture; peppermint candies add sweetness and crunch on top. Extracts vary in strength, so stick with peppermint extract rather than concentrated peppermint oil. Crushed candies are best in small, distinct pieces, not a fine powder.
- Heavy cream — Cold heavy cream whips into a topping that’s light against the dense filling. The cream itself doesn’t need to be expensive, but it should be cold so it reaches stiff peaks instead of staying loose.
Building the Crust and Filling Without Overworking Either
Pressing a Compact Chocolate Base
Heat the oven to 325°F and line a 12-cup standard muffin pan with paper liners. Stir the cookie crumbs with the melted butter and sugar until the crumbs look evenly moistened, then divide them among the liners. Press firmly across each bottom so the crusts form an even layer rather than a loose pile. Bake for 5 minutes, then let the crusts cool while you mix the filling.
Mixing a Smooth, Lightly Worked Filling
Beat the softened cream cheese and sugar in a large bowl until smooth, scraping down the sides and bottom as needed. Add the eggs one at a time, mixing after each addition so they incorporate without leaving streaks. Mix in the sour cream, vanilla, peppermint extract, and salt just until combined. If you keep beating after the batter is smooth, you’ll work in extra air that can make the cheesecakes puff and then sink as they cool.
Baking to a Gentle Center Jiggle
Divide the filling evenly among the cooled crusts. Bake at 325°F for 18–22 minutes, checking for edges that look set and centers that still jiggle slightly when the pan is nudged. The exact point can vary a little from one oven to another, so use the texture cue along with the timer. Avoid waiting for a completely firm center in the oven.
Cooling, Chilling, and Finishing the Tops
Set the pan on a wire rack and cool the cheesecakes for about 1 hour. Refrigerate them for at least 4 hours, until completely chilled; the centers need that time to firm up. Beat the cold heavy cream and powdered sugar in a chilled bowl until stiff peaks form. Spoon or pipe the whipped cream onto the cold cheesecakes, then add the crushed peppermint candies just before serving.
Three Ways to Adjust the Mint and Chocolate
Make the crust gluten-free
Use gluten-free chocolate cookie crumbs in place of the regular crumbs, keeping the same crumb-to-butter method. The base will still be chocolatey and crisp, though the exact texture depends on the cookies you use.
Keep the mint gentle
Leave the crushed peppermint candies off the topping and keep the peppermint extract in the filling. You’ll still get a clear mint note, but the finish will be less sweet and won’t have the candy crunch.
Turn them into chocolate cheesecakes
Leave out the peppermint extract and crushed peppermint candies, keeping the vanilla in the filling and the chocolate cookie crust. The result is a straightforward chocolate-and-cream cheesecake bite without the minty finish.
Storage and Serving
- Refrigerator: Keep the cheesecakes covered and refrigerated for up to 4 days. The crust softens a little over time, but the chilled filling holds its shape.
- Freezer: Freeze the chilled cheesecakes without whipped cream or candy, wrapped individually and stored in an airtight container, for up to 2 months. Thaw them in the refrigerator before adding the topping.
- Serving: Add the whipped cream and crushed peppermint just before serving. The cream holds its shape best when the cakes are cold.
Questions That Come Up While Making Peppermint Cheesecakes
Peppermint Cheesecakes
Ingredients
Equipment
Method
- Heat the oven to 325°F.
- Line a 12-cup standard muffin pan with paper liners.
- Stir the cookie crumbs, melted butter, and granulated sugar together until evenly moistened.
- Divide the crumb mixture among the liners and press firmly into the bottoms.
- Bake at 325°F for 5 minutes.
- Let the crusts cool while you make the filling.
- Beat the cream cheese and granulated sugar in a large bowl until smooth, scraping down the bowl as needed.
- Beat in the eggs one at a time.
- Mix in the sour cream, vanilla extract, peppermint extract, and salt just until combined.
- Divide the filling among the crusts.
- Bake at 325°F for 18–22 minutes, until the edges are set and the centers still jiggle slightly.
- Cool the cheesecakes in the pan on a wire rack for about 1 hour.
- Refrigerate for at least 4 hours until completely chilled.
- Beat the heavy cream and powdered sugar in a chilled bowl until stiff peaks form.
- Spoon or pipe the whipped cream onto the chilled cheesecakes.
- Sprinkle with crushed peppermint candies just before serving.


