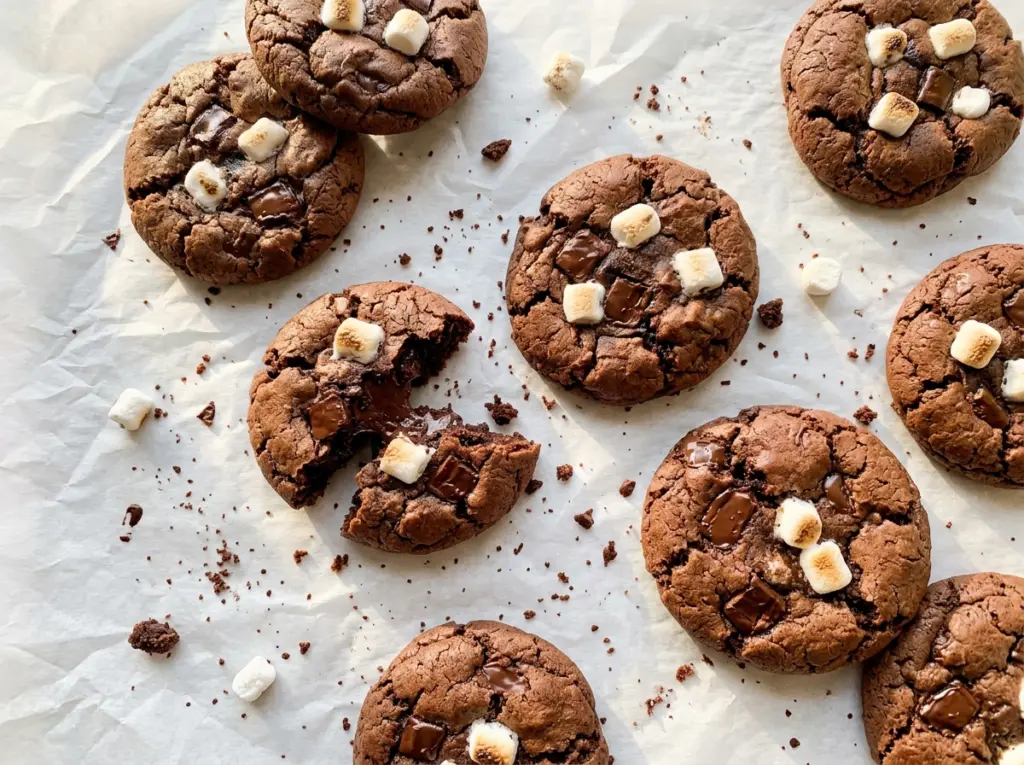

The melted chocolate and butter look silky in the bowl, but the dough won’t start out like ordinary cookie dough. It’s softer and glossier, more like a thick brownie batter, which is exactly why these Hot Chocolate Brownie Cookies land with fudgy centers and crackled tops instead of turning into dry little cakes.
Beating the eggs and sugar until pale and thick gives the batter the lift it needs, while a short chill makes it easy to scoop without adding extra flour. I let the chocolate cool for five minutes before mixing it in, then give the finished dough enough time in the refrigerator to firm up. The result is a batch of 18 cookies with a deep chocolate center and that familiar hot-cocoa sweetness.
Kitchen Note
Give the melted chocolate and butter a full five minutes to cool before they go into the eggs. It should still pour easily, but it shouldn’t feel hot; that pause keeps the egg mixture smooth.
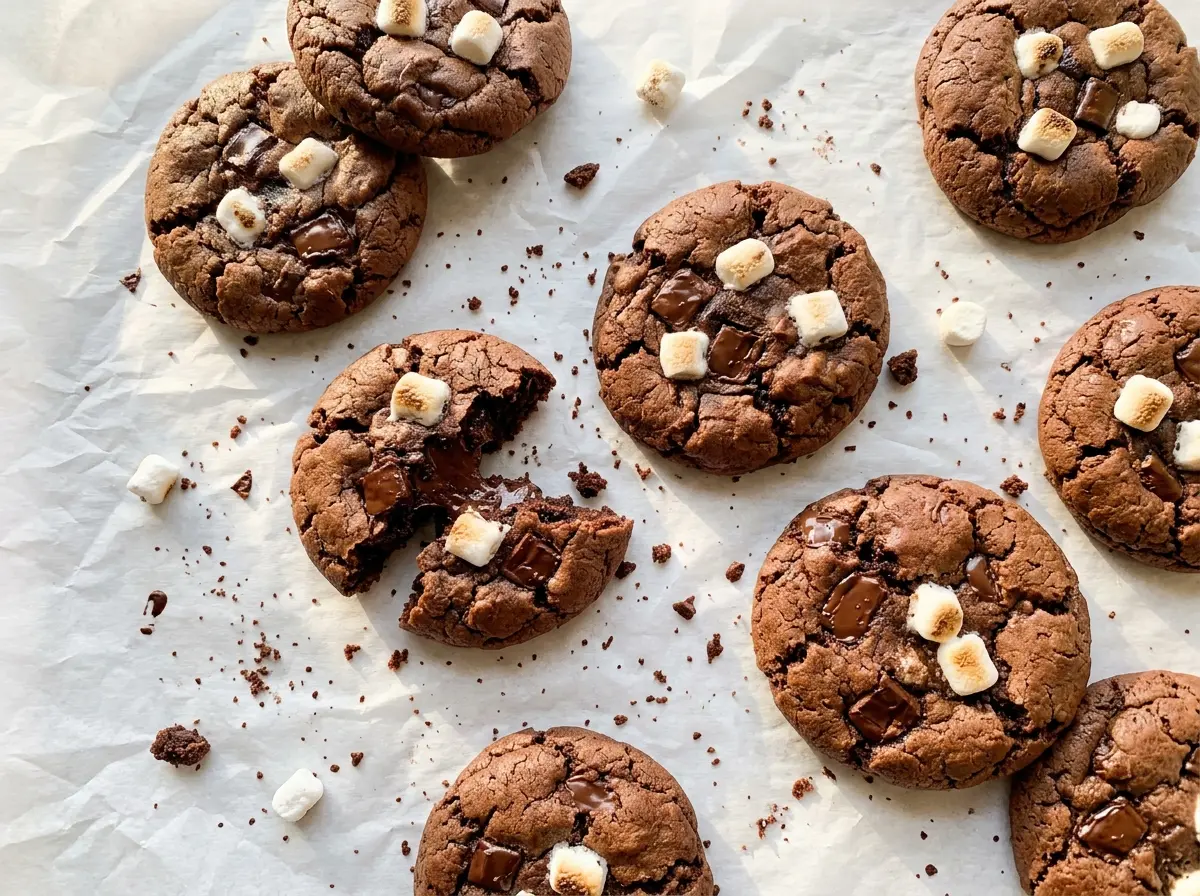
Save these Hot Chocolate Brownie Cookies for a chocolate fix with crackled tops and soft, brownie-like centers.
Why the Egg-and-Sugar Beat Makes These Tops Crackle
Brownie cookies sit between two familiar textures: they should have enough structure to hold their shape, but not so much flour that they eat like small chocolate cakes. The eggs and sugar do a lot of that balancing here. Beating them for several minutes creates a pale, thick base that can hold the melted chocolate and the dry ingredients without needing extra flour to stiffen the dough.
That’s also why it’s worth using the mixer cue rather than stopping as soon as the sugar looks blended in. A thin, aerated layer forms on the surface as the cookies bake, giving the tops their characteristic cracks. If the batter goes into the oven before the eggs and sugar have thickened, the cookies may spread more and the tops may look less defined. The chill helps with a different problem: it firms the glossy batter enough to portion neatly, so each cookie starts at a similar size and bakes at a similar pace.
What the Cocoa Mix Adds That Plain Cocoa Can’t

- Semisweet chocolate — Chopped chocolate melts into the butter and gives the cookies their dense, brownie-like base. A good supermarket baking bar is plenty; you don’t need a specialty brand. Semisweet chocolate chips can stand in at the same weight, though chopped chocolate from a bar usually melts more smoothly.
- Unsalted butter — Butter carries the melted chocolate and rounds out its flavor. A standard grocery-store butter works well here; there’s no need to seek out cultured butter. I wouldn’t trade it for oil, since the butter is part of the melted base and oil changes the texture.
- Room-temperature eggs — They beat more readily with the sugar and blend into the chocolate mixture without cooling it as sharply as cold eggs would. Use ordinary large eggs. There isn’t a simple one-for-one egg swap that preserves the same lift and brownie-cookie texture.
- Hot cocoa mix — Unlike unsweetened cocoa, this brings sweetened cocoa flavor to the dry mixture. The mix’s sweetness and flavor vary by brand, so use one you enjoy drinking; a basic supermarket mix works. Plain cocoa powder isn’t a direct replacement because it doesn’t supply the same sweetness.
- Unsweetened cocoa powder — This deepens the chocolate flavor without adding the sweetness already present in the cocoa mix. A fresh, ordinary baking cocoa is fine; if the tin smells flat or stale, the cookies will taste less chocolatey.
- All-purpose flour and baking powder — Flour gives the soft batter enough structure to bake into cookies, while baking powder provides lift. Spoon flour into the measuring cup and level it rather than packing it in; too much can make the centers dry. For a gluten-free batch, a cup-for-cup gluten-free baking blend made to replace all-purpose flour is the most practical swap.
From Glossy Batter to Crackled Cookie Tops
Melt the Chocolate Without Scorching It
Heat the oven to 350°F and line two baking sheets with parchment paper. Put the chopped chocolate and butter in a microwave-safe bowl, then microwave in 20-second bursts, stirring after each one until the mixture is smooth. Short bursts give you a chance to catch any unmelted pieces before the chocolate overheats. Let the mixture cool for five minutes while you start the eggs.
Beat the Eggs and Sugar Until Thick
In a large bowl, beat the room-temperature eggs and granulated sugar with an electric mixer on medium-high for 3 to 4 minutes. Look for a mixture that has turned pale and thick rather than thin and grainy. Beat in the vanilla, then lower the mixer speed and slowly add the cooled chocolate mixture. Stop when it’s evenly combined; there shouldn’t be streaks of egg mixture or chocolate.
Fold in the Dry Ingredients and Chill
Whisk the flour, hot cocoa mix, unsweetened cocoa powder, baking powder, and salt together in a separate bowl so the leavener is distributed. Fold the dry mixture into the chocolate batter just until no dry streaks remain. The dough will be soft before chilling, so don’t add extra flour to make it feel like standard cookie dough. Chill it for 20 to 30 minutes, until it’s firm enough to scoop.
Scoop, Bake, and Let the Centers Set
Scoop rounded 1 1/2-tablespoon portions onto the lined sheets, spacing them about 2 inches apart. Bake for 10 to 12 minutes, rotating the sheets and switching their rack positions halfway through. Pull them when the tops are crackled and the edges have set, even if the centers still look slightly soft; they’ll finish setting as they cool. Leave the cookies on the baking sheets for 10 minutes, then move them to a wire rack to cool completely.
Three Small Changes That Give These Cookies a Different Spin
Make Them Gluten-Free
Replace the all-purpose flour with the same amount of a cup-for-cup gluten-free baking blend intended for cookies and cakes. The centers may feel a little less stretchy than the wheat-flour version, but the cocoa and melted chocolate still give them a rich brownie texture.
Bring in a Peppermint Cocoa Note
Use peppermint hot cocoa mix in place of the regular hot cocoa mix, keeping the amount the same. It shifts the flavor toward mint and chocolate without changing the mixing method; the exact mint intensity depends on the mix.
Use Bittersweet Chocolate for a Deeper Edge
Swap the semisweet chocolate for the same amount of bittersweet chocolate. The finished cookies taste darker and less sweet, while keeping the same soft brownie-like center.
Storage and Reheating
- Refrigerator: Keep the cooled cookies in an airtight container for up to 5 days; the centers will feel firmer when cold.
- Freezer: Freeze fully cooled cookies in an airtight container for up to 2 months. Thaw at room temperature before serving.
- Reheating: Warm a cookie in the microwave for about 5 seconds if you want a softer center. Longer heating can make the chocolate dry and overly hot.
Questions That Come Up While Baking These Brownie Cookies
Hot Chocolate Brownie Cookies
Ingredients
Equipment
Method
- Heat the oven to 350°F.
- Line two baking sheets with parchment paper.
- Combine the chocolate and butter in a microwave-safe bowl and microwave in 20-second bursts, stirring each time, until smooth.
- Let the chocolate mixture cool for 5 minutes.
- In a large bowl, beat the eggs and sugar with an electric mixer on medium-high speed for 3 to 4 minutes, until pale and thick.
- Beat in the vanilla.
- With the mixer on low, slowly beat in the melted chocolate mixture until combined.
- In a separate bowl, whisk together the flour, hot cocoa mix, cocoa powder, baking powder, and salt.
- Fold the dry ingredients into the chocolate mixture just until no dry streaks remain.
- Chill the dough for 20 to 30 minutes, until scoopable.
- Scoop rounded 1 1/2-tablespoon portions onto the prepared baking sheets, spacing them about 2 inches apart.
- Bake for 10 to 12 minutes, rotating the sheets and switching their rack positions halfway through, until the tops are crackled and the edges are set while the centers still look slightly soft.
- Let the cookies cool on the baking sheets for 10 minutes.
- Transfer the cookies to a wire rack to cool completely.